A soldering kit sounds simple until the job shifts from joining two wires to recovering a lifted pad, replacing a QFN regulator, or cleaning up a connector that has been overheated twice already. At that point, the useful kit is not the cheapest bundle with the most accessories. It is the set of tools that lets you control heat, stabilize the board, inspect the joint, and decide when rework will save the assembly versus when it will damage it further.
For PCB rework, the best soldering kit is really a bench system. The iron matters, but so do tip geometry, flux choice, board support, lighting, cleanup materials, and the way you handle thermal mass. This guide focuses on what actually belongs in that kit when the target is electronics repair and board-level troubleshooting rather than generic hobby soldering.
Before you buy tools, define the boards you really expect to repair
A kit for cable splices and through-hole headers can be lightweight and cheap. A kit for laptop daughterboards, LED metal-core boards, power modules, or fine-pitch sensor boards cannot. Start by listing the packages and failure modes you expect to face most often: small passives, SOIC devices, QFN parts with exposed pads, heat-sunk connectors, lifted pads, oxidized terminals, or field-damaged wire-to-board joints. That list tells you whether a single iron is enough or whether you also need hot air, preheating, magnification, or stronger board fixturing.
This is also where many buyers overspend on the wrong things. Ten extra tips do not help if the station cannot recover temperature on a ground-heavy plane. A decorative carrying case does not help if the board moves every time you touch a shield can. In real PCB repair, stability and thermal control beat bundle quantity almost every time.
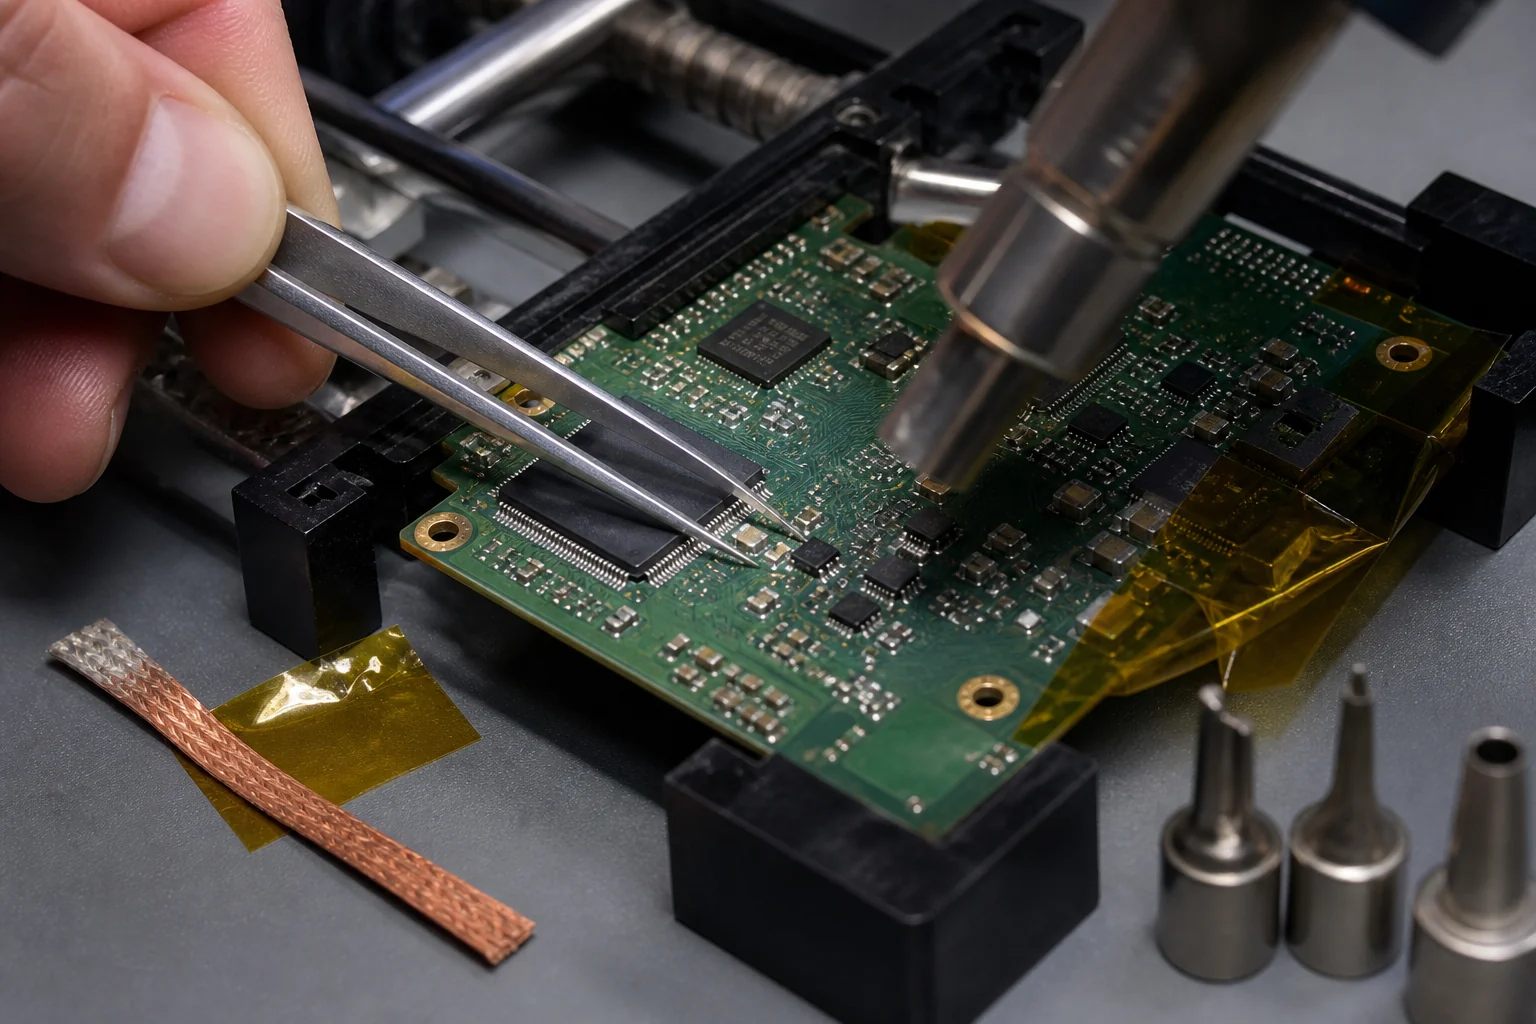
The core of a real PCB rework soldering kit
The center of the kit is a temperature-controlled soldering station with predictable recovery, replaceable tips, and enough power for both delicate pads and larger copper areas. For modern PCB work, a simple plug-in iron without feedback usually wastes time and damages boards because the actual tip temperature swings too far when it meets a connector shell, thermal pad, or heavy ground pour.
From there, the essential supporting items are straightforward:
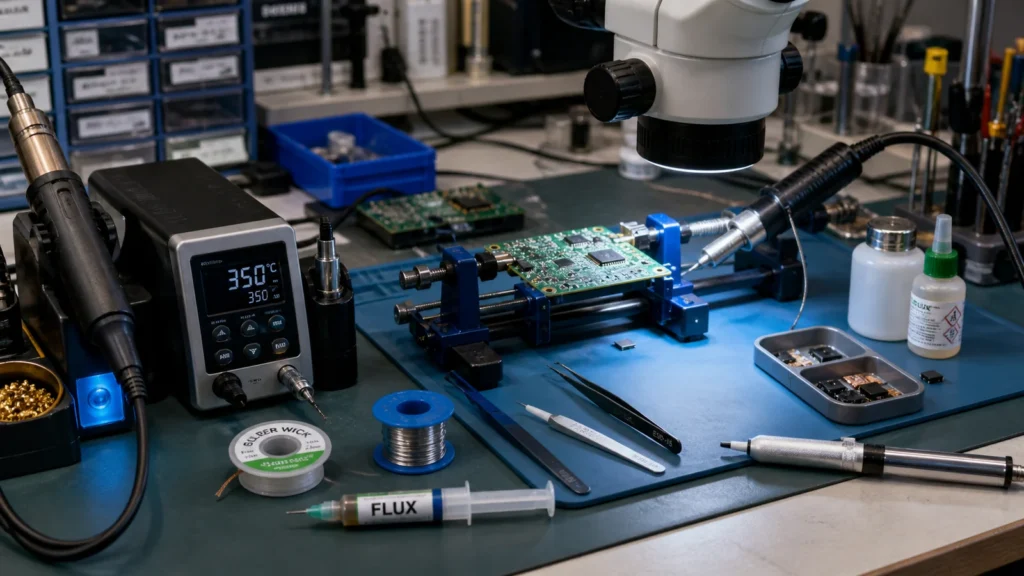
- At least three tip shapes: a fine conical or needle tip for tight access, a small chisel for most SMD work, and a larger chisel or bevel tip for connectors, wires, and pads with more copper.
- Good solder wire matched to the work. Thin wire helps on fine-pitch repairs; thicker wire is more efficient on connectors and through-hole joints.
- Flux in a controllable format, usually a syringe or pen, because dry rework causes pad tearing and poor wetting. ReversePCB already covers how soldering flux changes repair quality.
- Solder wick for bridge cleanup and pad preparation.
- Fine ESD-safe tweezers for part handling and alignment.
- A brass cleaner or suitable tip cleaning method that keeps the tip active without abusing plating.
- Board support such as a vise or PCB holder so the assembly does not shift under pressure.
- Inspection support: at minimum a strong lamp and magnifier, ideally a microscope for dense SMD work.
If the kit stops there, it can handle a lot of bench work. But it still will not cover every rework case well, especially on thermally heavy or densely packed boards.
When hot air, preheat, and shielding stop being optional
Many “soldering kit” lists ignore the jobs that are most likely to destroy a PCB: pulling multi-pin connectors, removing shielded modules, reworking QFN packages, or touching metal-core LED boards with large thermal paths. In those cases, the missing tool is often not a different iron tip but a second heat strategy.
A hot-air tool becomes important when the part has many pins, hidden solder joints, or enough copper attachment that one-sided heating creates peeling risk. Preheat matters when the board keeps sinking heat away faster than the joint can reflow. Thermal shielding matters when nearby plastic connectors, microphones, displays, or flex tails would otherwise absorb that heat damage. If your repair queue includes power boards or LED assemblies, these tools are not luxury upgrades. They are what keeps rework from turning into laminate abuse.
This is also where repair judgment matters. If you have to dwell too long, force the part, or keep adding solder to “make it move,” the process is already drifting toward pad lift, barrel damage, or inner-layer stress. A stronger kit reduces that risk because it lets you get in and out with better control.
Choose kit items by failure mode, not by marketing bundle
The most useful way to build a kit is to match it to the defect you expect.
- For cold joints, intermittent connectors, and field wire repairs, prioritize a stable iron, correct tip mass, fresh flux, and good inspection. A weak iron often creates the same defect you are trying to fix. ReversePCB’s cold solder joint guide is relevant here.
- For bridge cleanup and fine-pitch touch-up, prioritize wick quality, flux delivery, magnification, and tip geometry more than raw station wattage.
- For pad repair and trace-adjacent work, prioritize board fixturing, precision tweezers, lighting, and patience. Mechanical stability matters as much as heat.
- For connectors, shields, and large grounded parts, prioritize larger tips, hot air, and sometimes preheat so you can move enough heat without overstressing one corner.
- For repeated rework on production or service benches, prioritize consumables discipline: spare tips, wick, flux, cleaning swabs, and consistent ESD-safe layout. A bench that runs out of the small items causes more process drift than most people expect.
That same logic applies to solder alloys and pad condition. A board that has already seen lead-free reflow, contamination, and one bad repair attempt behaves differently from a fresh prototype. The kit has to support cleanup and recovery, not just first-pass assembly.
Common kit mistakes that show up in real board work
The first mistake is buying a beginner bundle and assuming the included accessories are all equally useful. In practice, the bundled solder sucker, random tips, and generic stand often matter less than one good chisel tip, one reliable flux syringe, and a holder that keeps the board flat. The second mistake is ignoring inspection. You cannot consistently judge heel wetting, lifted mask edges, or bridge remnants by eye on dense boards.
The third mistake is treating every board like FR-4 with moderate copper. Repair on aluminum-backed LED boards, power converters, and connector-heavy control boards is a different thermal problem. If the bench lacks the ability to spread heat or protect nearby parts, the operator compensates with dwell time, and dwell time is where rework quality starts to collapse.
The fourth mistake is forgetting pad and surface condition. Even a good station cannot rescue oxidized pads or contaminated joints without proper prep. ReversePCB’s notes on solder pad basics are a reminder that surface condition often decides whether the repair will hold after vibration, thermal cycling, or another service event.
What a practical starter kit looks like for bench rework
If the goal is one solid starter kit for PCB rework, build it around a station and a workflow rather than a gift-box list. A practical setup is a 70 W to 100 W class temperature-controlled station, three well-chosen tips, one good flux format, quality wick, fine tweezers, ESD mat, holder or vise, tip cleaner, IPA and swabs for cleanup, and bright inspection lighting. If your jobs include multi-pin SMD removal or heavy thermal pads, add hot air early rather than after the first damaged board teaches the lesson for you.
That setup will outperform many bigger “kits” because each item supports a real repair decision. It lets you choose whether to touch only the joint, heat the entire part, stabilize the board, clean the site for reattachment, or stop before the board becomes a scrap candidate.
A soldering kit is really a process-control kit
The reason a soldering kit matters in PCB work is not convenience. It is process control. Good rework depends on controlled heat, controlled motion, controlled contamination, and controlled inspection. Once you judge the kit by those four constraints, the buying decision becomes much clearer. You stop chasing bundle size and start building a bench that can remove a fault without adding two more.
For ReversePCB readers, that is the useful standard: choose the soldering kit that fits your board mix, copper mass, package types, and repair risk. If the kit helps you make cleaner joints, protect pads, and verify the result before power-up, it belongs on the bench. If it only makes the unboxing look complete, it probably does not.
FAQ
What is the most important part of a soldering kit for PCB rework?
The most important part is a temperature-controlled soldering station with stable recovery, because PCB rework fails quickly when the tip cannot hold heat on real copper loads. After that, flux, tip selection, board fixturing, and inspection support matter more than extra bundle accessories.
Do I need hot air in a soldering kit for electronics repair?
If you only repair simple through-hole joints or light wire work, not always. If you remove multi-pin SMD parts, shields, QFN packages, or thermally heavy connectors, hot air becomes a practical requirement because it reduces dwell time and pad damage risk.
Can a cheap soldering kit damage a PCB?
Yes. The risk usually comes from poor thermal control, weak recovery, unstable stands, and low-quality consumables. Those limits push the operator into longer dwell times, repeated heating, and mechanical force, which can lift pads, damage barrels, or overheat nearby components.
Which accessories are more useful than they look in a PCB soldering kit?
Good flux, quality solder wick, ESD-safe tweezers, a rigid PCB holder, and proper lighting are often more valuable than novelty accessories. They directly improve wetting, cleanup, alignment, and inspection, which are the areas that usually decide whether a repair survives real service conditions.