What is a Cold Solder Joint?
Cold solder joints, also commonly known as pseudo soldering, are one of the bad solder joints produced during the PCBA or SMT process. Because the solder joint lacks the formation of good intermetallic compounds (IMCs), it creates an unreliable connection between the pcb components and the substrate, which can lead to serious line failures.

Cold Solder Joint Vs Good Solder Joint
A cold solder joint is a flawed solder joint that results from the improper application of heat or the use of incorrect soldering techniques. In contrast, a good or ideal solder joint is a strong, durable connection that is free from defects.
Here are some examples of cold and good soldering:
Cold Solder Joint Symptoms
- dull or grainy joint
- lumpy or blob-like joint
- weak or brittle connection
- circular cracks
- bulging solder point
- concave shaped joint

Good solder joint features
- cone-shaped fillet joint
- volcano shape
- shiny solder
- 45 ℃ abrupt slope

What Causes Cold Solder Joints?
There are a number of factors that can lead to cold solder joints. Below are some of the common reasons:
Not enough solder paste
In the solder paste printing process, the stencil opening is too small or the scraper pressure is too small, resulting in a small amount of tin output. During soldering, the amount of solder paste at the solder joint is insufficient and the components cannot be completely welded, resulting in pseudo soldering.
Poor quality of solder paste
Solder paste can be affected by oxidation, which can impact its soldering performance and cause cold soldering joints.
Low melting point of the solder paste
Low-temperature solder pastes can have a lower melting point. So it will melt and shed, with the rise of the component temperature.
Poor performance of the flux
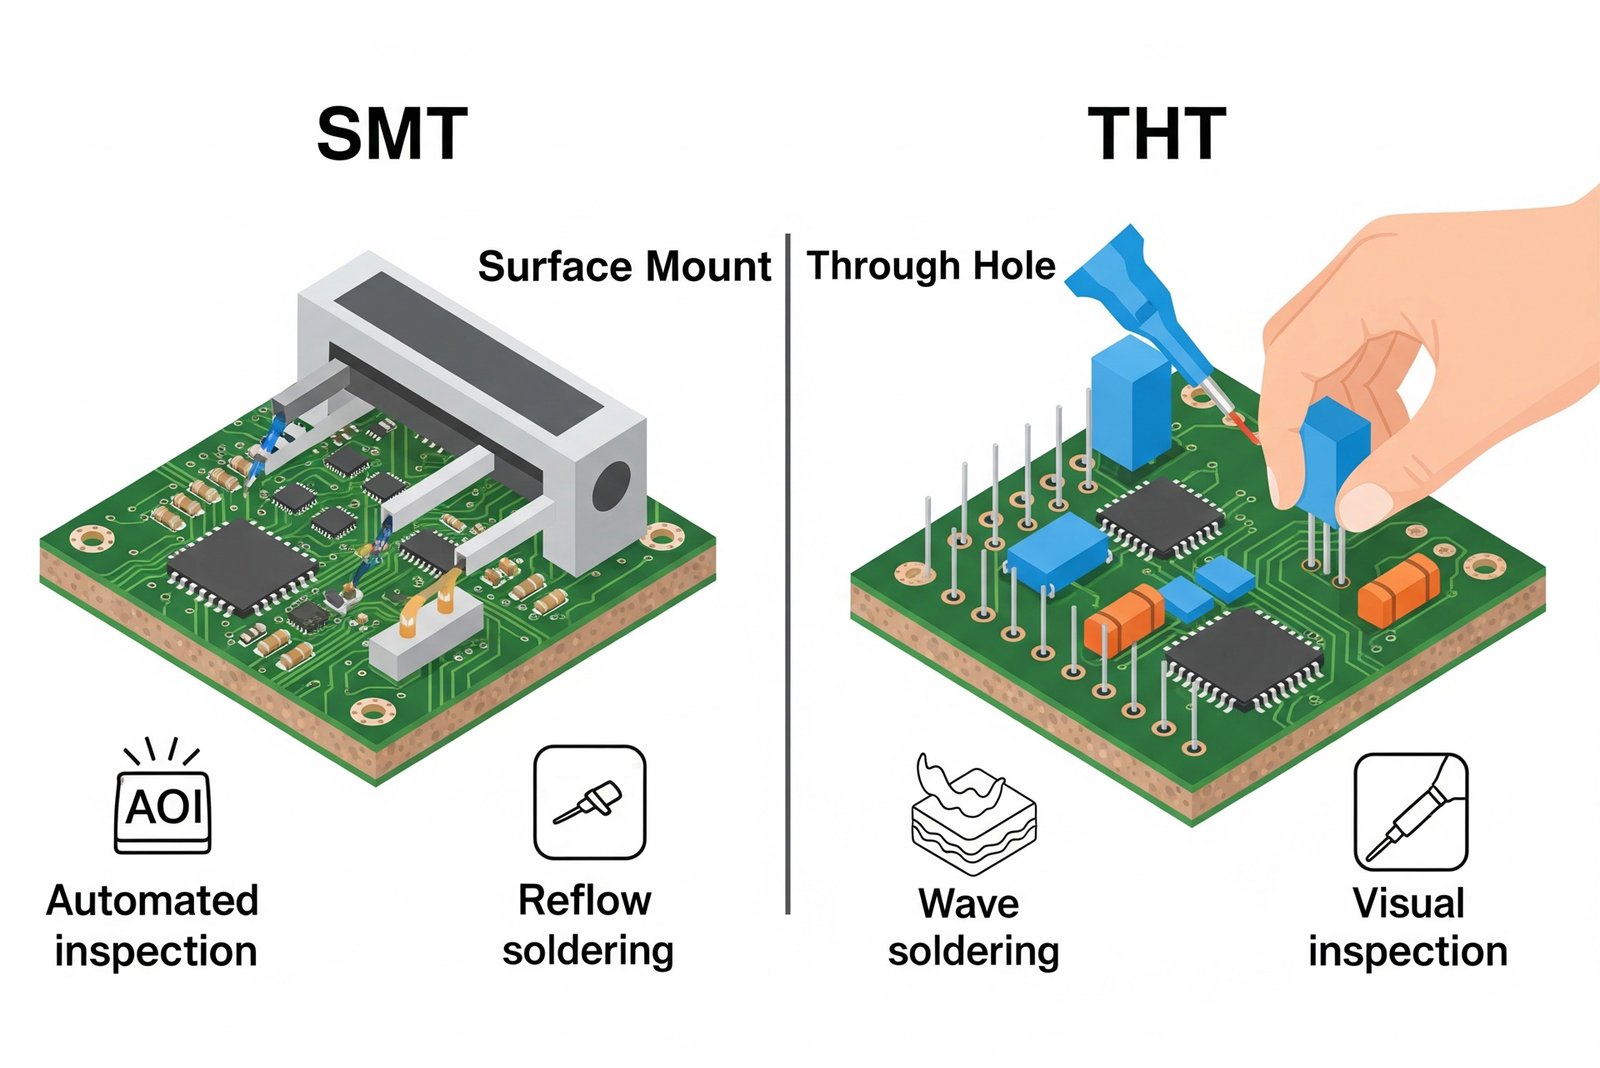
During the THT or SMT assembly process, flux coating is necessary before wave soldering to remove oxides on the component solder surface and PCB socket holes and pads. Poor flux performance can lead to cold solder joints.
Unclean soldering surface
In the production of electronic products, electronic components go through various processes such as through-hole technology (THT) and surface-mount technology (SMT). During these processes, it’s inevitable that dust, oil, or metal residues can contaminate the components, which can directly cause the cold solder joints.
Incorrect temperature of soldering iron
If the temperature is too low, the solder paste will not fuse properly with the pad, and the solder paste will be grainy. If the temperature is too high, the solder will flow and accelerate the oxidation rate of its surface, and the solder paste at this time is like a bead. They can all cause pseudo soldering or non-soldering. Recommended temperature: eutectic tin-lead solder: 215°C; Lead-free solder: 240°C
Incorrect soldering time
Beginners may solder before the tin solidifies, and then remove the tweezers that hold the component, causing the component pins to become soldered. Afraid of scalding the components, the electric soldering iron was quickly removed, and as a result, the soldering time was not enough to melt the tin on the solder joint.
Component pin oxidation
The oxidation of solder pads and component leads can affect their surface wetting properties, which in turn can affect the quality of soldering. If there is too much oxidation on the surface of the solder pad or component lead, the solder cannot effectively wet them, which can lead to weak or no solder joints (cold soldering). In addition, the oxides can result in small air pockets on the surface of the solder joint, which may cause the joint to loosen during use.
Component pin distortion
SMD devices with thin spacing between pins, such as QFP and SOP packages, are more susceptible to pin damage and deformation. This can result in reduced coplanarity and some pins not attaching tightly to the pad, leading to pseudo soldering.
Poor pad design
There are through-holes on the pads, which can cause solder loss and shortages;
The spacing of the pads is too small, the solder joints are too dense, and the component pads are too large;
the pad size does not match the component pin size.
How To Detect and Fix Cold Solder Joints?
Here are 5 ways to detect and test the cold solder joints on your circuit board:
Visual checking
Sometimes, it’s easy to detect the pseudo soldering by visual inspection. We just need to focuse on big components, high heat production components, and the disconnected component pins.
Magnifying lens
Use a magnifying lens with a high magnification to carefully check the bottom of the circuit board, especially to check the components with high power and large heat generation, such as high-power resistors, three-terminal voltage regulators, transistors, chips, power pins of the integrated block and output pins of the field block, deflection coil lead out of the pile head, etc., most of the faults can be solved by repair welding.
Shaking the components
After determining the area where the cold solder joint may appear, shake the low-voltage components one by one with a hand or camera to feel whether the components are loose, which should mainly shake the relatively large components.
Vibrating the board
You can also take this method of tapping the circuit board with a screwdriver to determine the position of the cold solder joint. However, when using this method, you should take care of yourself. And make sure the equipment should be protected.
Checking with a multimeter
Follow these steps to check cold solder joints using a multimeter:
- Turn the multimeter to the continuity setting.
- Touch the multimeter probes to each side of the solder joint. If the multimeter beeps, the joint is good. If it doesn’t beep, move to the next step.
- Touch the solder joint with the tip of the soldering iron to reflow the solder.
- Wait a few seconds for the joint to cool, then touch the multimeter probes to the joint again. If the multimeter beeps, the joint is good. If it doesn’t beep, the joint is likely a cold solder joint.
If you find a cold solder joint, you will need to rework it. Use a soldering iron to reheat the joint and add more solder to ensure proper flow and connection. Once the joint has been reworked, test it again with the multimeter to ensure it is good.
How to Avoid Cold Solder Joints?
Use sufficient solder
Using sufficient solder is critical to avoid cold solder joints. Cold solder joints occur when there is not enough solder applied to the joint or when the solder does not flow properly. However, using too much solder can also cause problems, such as a “blob” of solder that can short out other components.
Clean soldering iron
The electric soldering iron tip is prone to oxidation due to high-temperature. This can cause the bad thermal conductivity and poor soldering result. Therefore, you can use a damp cloth or wet sponge to clean the soldering iron tip.
Lead free soldering
Use high-quality lead-free solder to ensure a good flow and melting point.
Pollution free
Clean the surfaces to be soldered with a wire brush or sandpaper to remove any oxidation or contamination.
Control temperature
Choose the right temperature for soldering iron. In generally, the soldering temperature must be larger at least 15°C than melting point of the solder alloy.
Control time
Make sure the time is enough for the soldering iron to melt the solder. With short time, it will cause the insufficient wetting of flux, and dry joint. With long time, the surface of the solder joint may oxidize.
Conclusion
Cold solder joints are one of the most common problems with electronics manufacturing and they can be difficult to detect and fix. However, with the right tools and techniques, they can be fixed quickly and easily. By following the tips and tricks outlined in this article, you should be able to fix any cold solder joint and get your PCBs back up and running.
We also go over some best practices for soldering in general as well as troubleshooting suggestions for specific situations if you find yourself struggling with cold solder joints again.