STM32CubeMX is an STM32 chip graphical configuration tool launched by STMicroelectronics (ST). The software is efficient and convenient. It can achieve many configurations through simple operations, allows the use of graphical wizards to generate C language code, and supports MDK, IAR For ARM, TrueStudio and other tool chains.
Introduction to STM32CubeMX
STM32CubeMX is a widely used STM32 chip graphical configuration tool. It integrates chip selection, pin assignment and function configuration, middleware configuration, clock configuration, initial code and project functions.
STM32 supports a wealth of open source and ST independent intellectual property middleware, such as FreeRTOS, FatFS, mbedTLS from the open source community; ST’s own USB host and device protocol stack, TouchGFX, etc.
Benefits of STM32CubeMX
- Covers almost all STM32 series chips;
- No need to configure complex parameters of various peripherals;
- Supports the use of graphical wizards to generate initialization code;
- Supports multiple tool chains, such as MDK, IAR For ARM, TrueStudio, etc.
STM32CubeMX Download and Installation
Before installing STM32CubeMX, please make sure your computer already has JRE (Java Runtime Environment):
STM32CubeMX Download

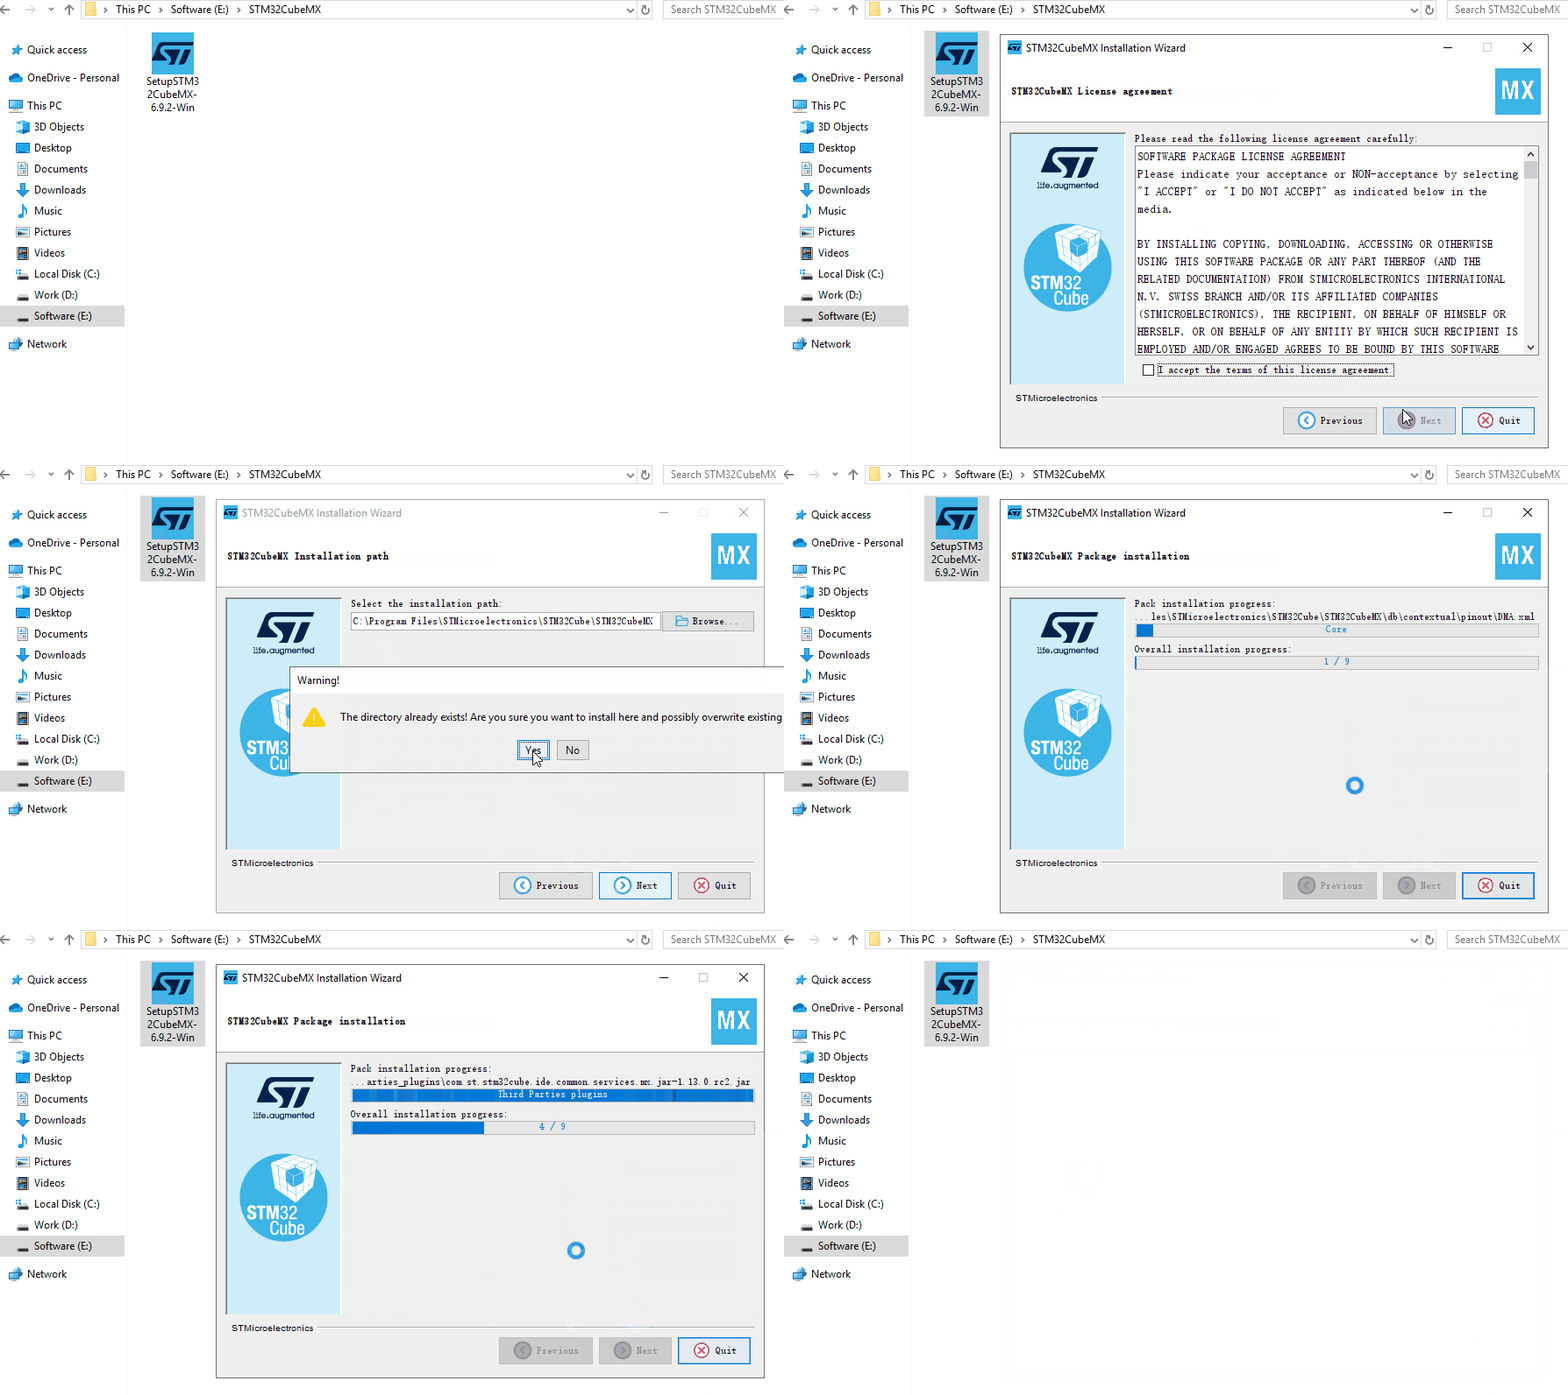
STM32CubeMX Installation
The latest version now (2023) is V6.9.2. The systems that support installation are as follows:
- Windows: 7, 8, 10 (32 64 bit)
- Linux: RedHat, Ubuntu and Fedora (32 64-bit)
- macOS: OS X El Capitan and Sierra
Install HAL Library
STM32 HAL firmware library stands for Hardware Abstraction Layer. It is the latest abstraction layer embedded software launched by ST Company for STM32 MCU, aiming to achieve seamless migration between STM32 series MCUs.
When the HAL library was launched, a lot of third-party middleware was also added, including RTOS, USB, TCP/IP and graphics.
The HAL library has two methods: online installation and offline installation.
Here we show the first way:
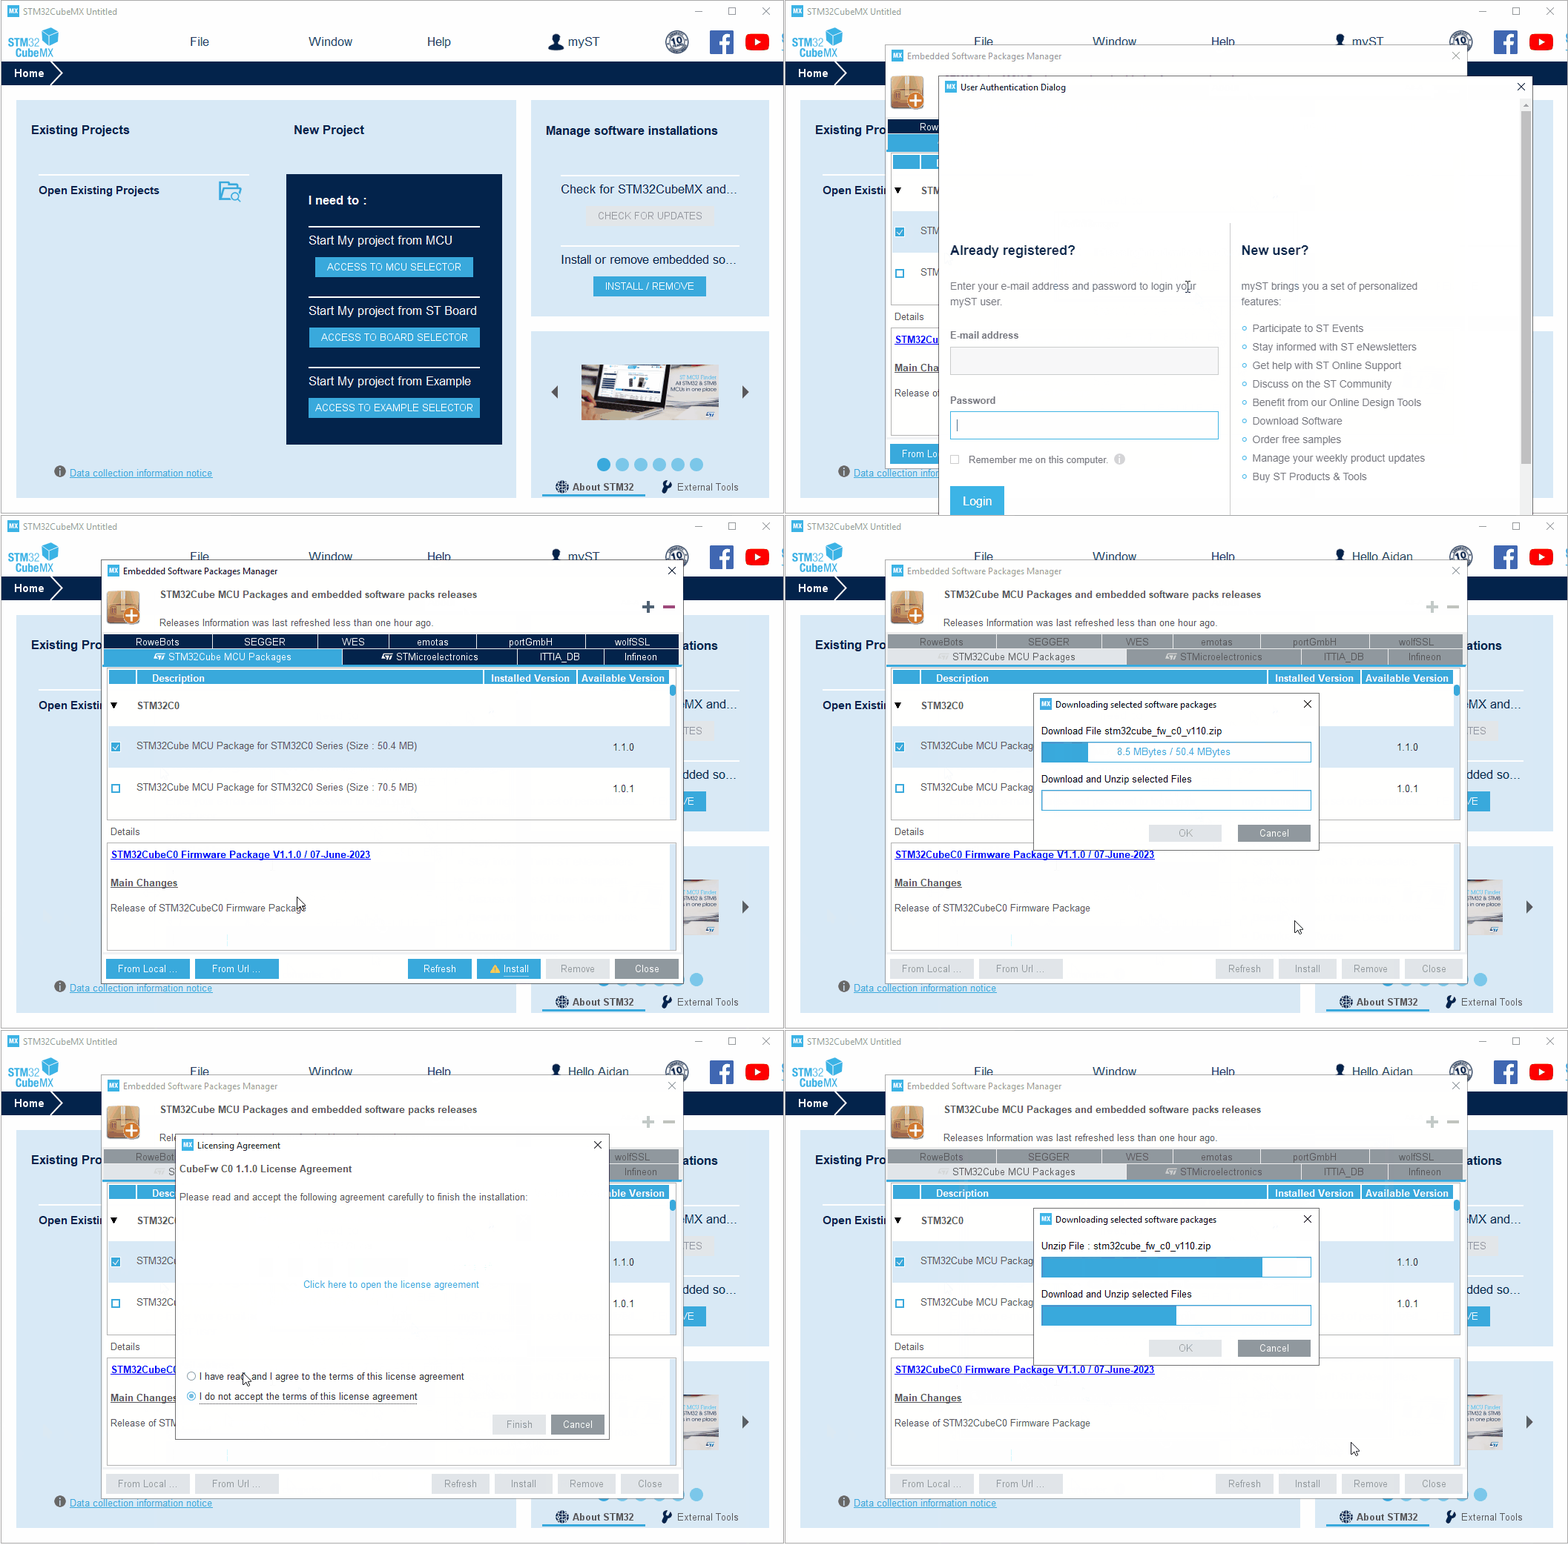
Open the installed STM32CubeMX software and enter the library management interface (Help -> Manage embedded software packages). Then check the HAL library you want to install and click “Install Now” until the installation is successful. As shown in the following animation:
How to Create a STM32CubeMX Project?
In this tutorial, i provide a simple example of LED flashing for beginners.
Tools Required
- STM32CubeMX and HAL library;
- A development board;
- A ST-Link downloader;
- IDE such as: MDK-ARM, EWARM, TureSTUDIO, SW4STM32, etc.
Create A New Project
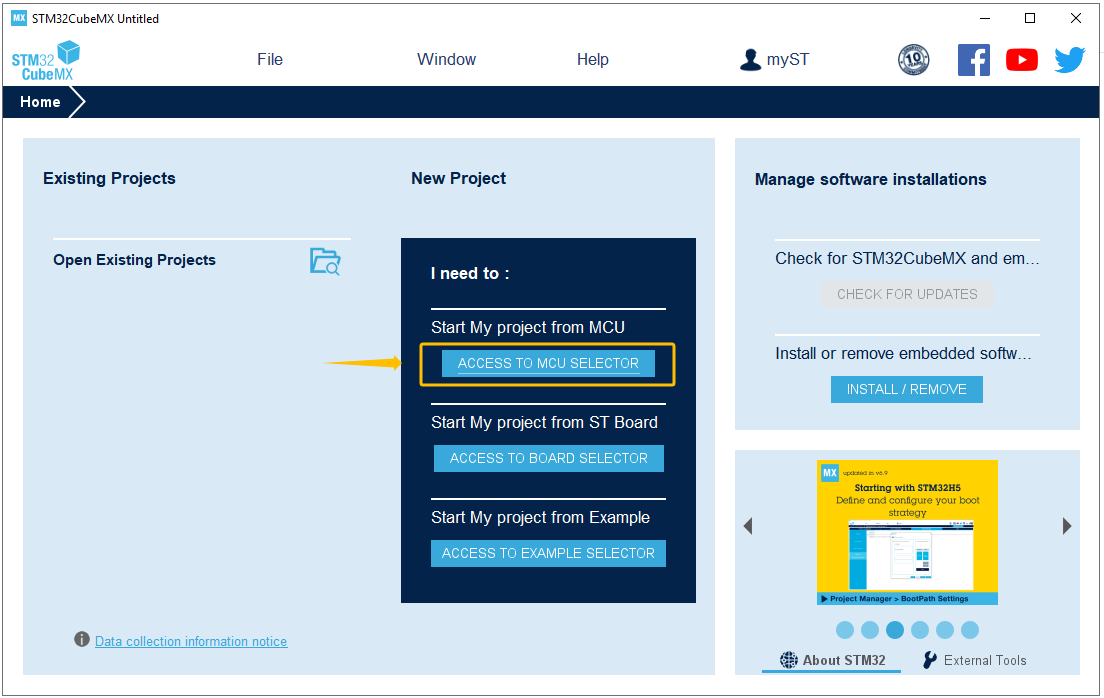
Open MCU Selector
Open STM32CubeMX and enter the MCU selector.
Select MCU
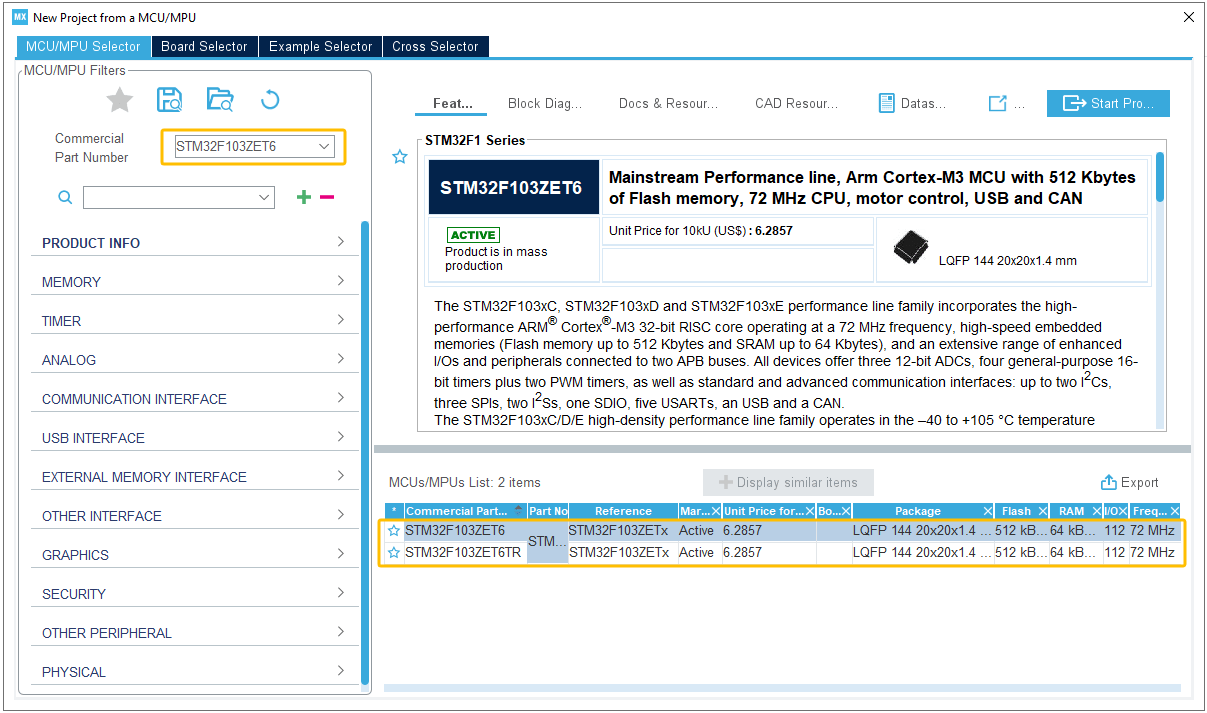
Select your MCU model, such as STM32F103ZET6.
Select Clock Source
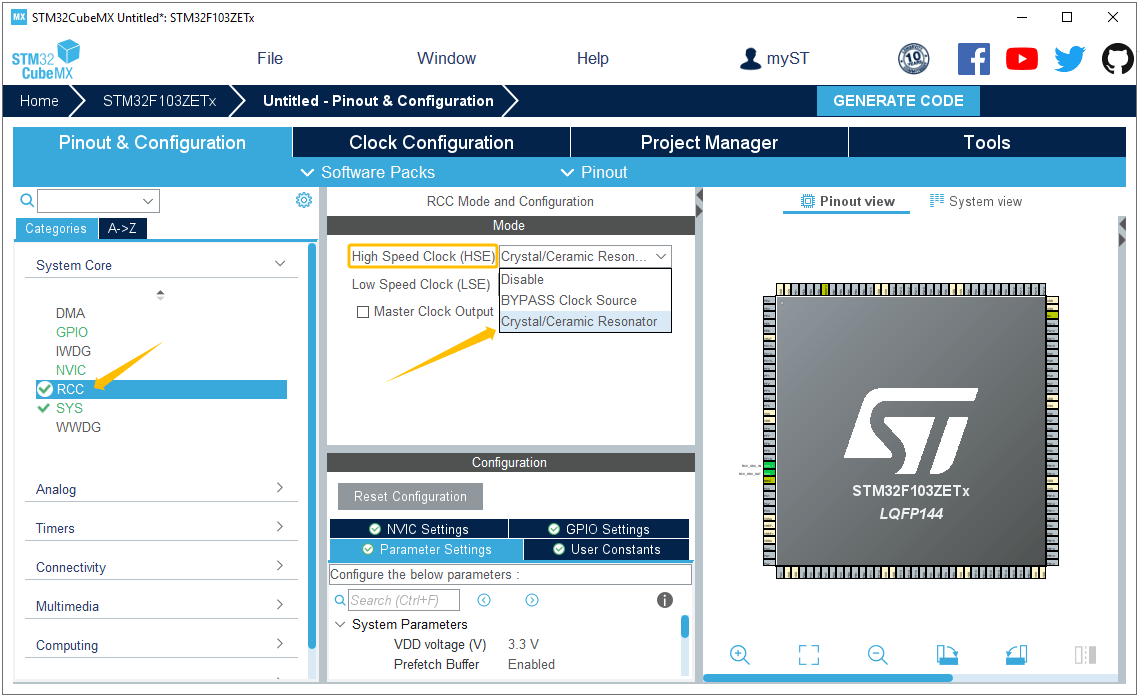
If you choose to use an external high-speed clock (HSE), you need to configure RCC in System Core (as shown below). If using the default internal clock (HSI), this step can be skipped.
Select GPIO (LED) Pin
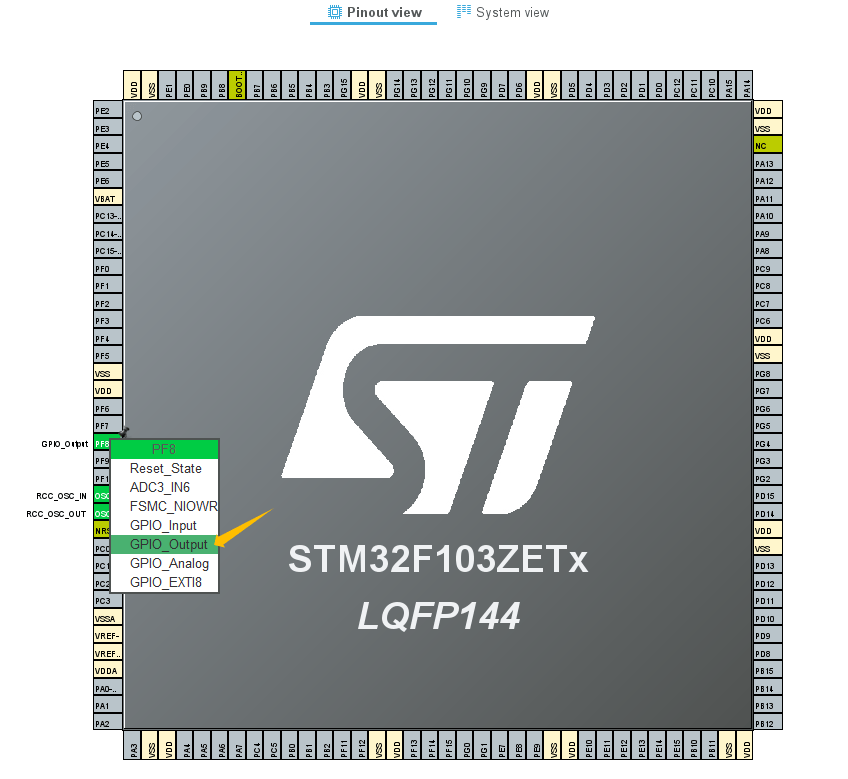
We use a GPIO pin (PF8) here to control the LED on and off.
Configure Clock
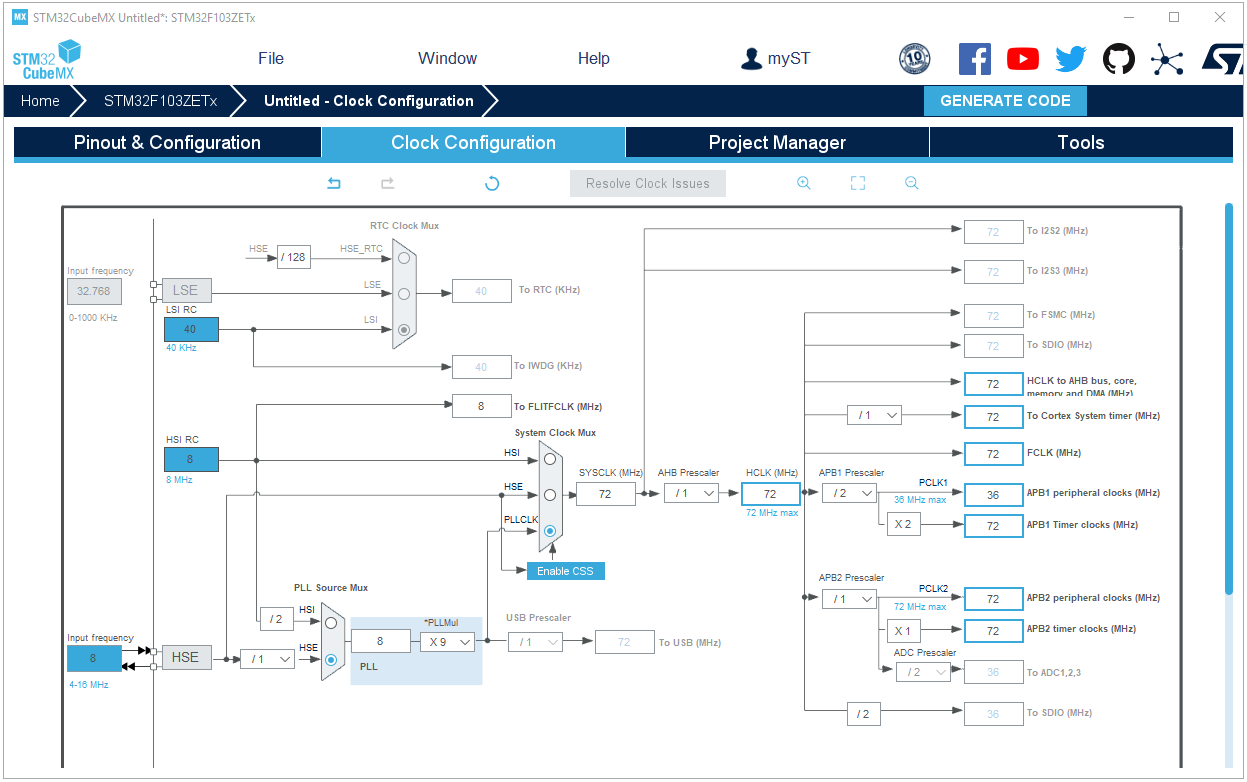
The default clock is the internal high-speed clock (HSI). Here, we change it to the external high-speed clock (HSE).
Project Manager
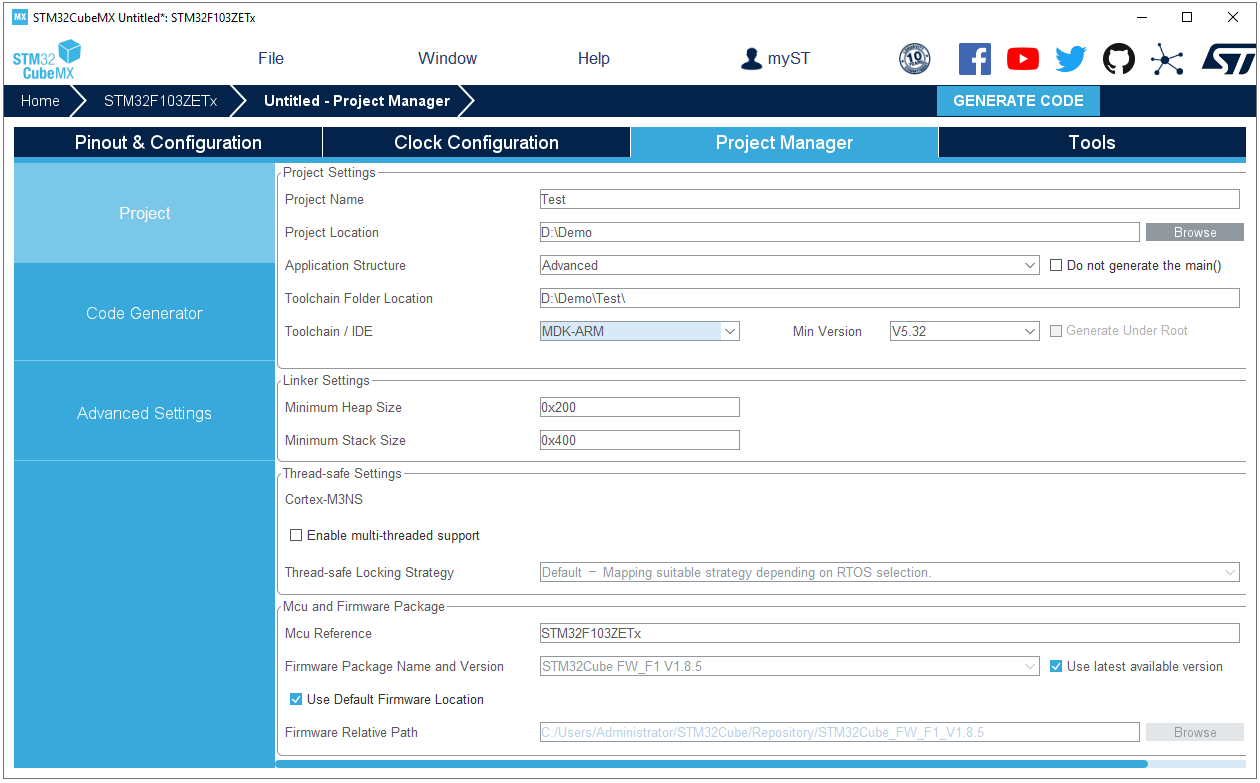
Here, you can DIY your project settings: project name, project location, Toolchain/IDE and more.
Generate Code
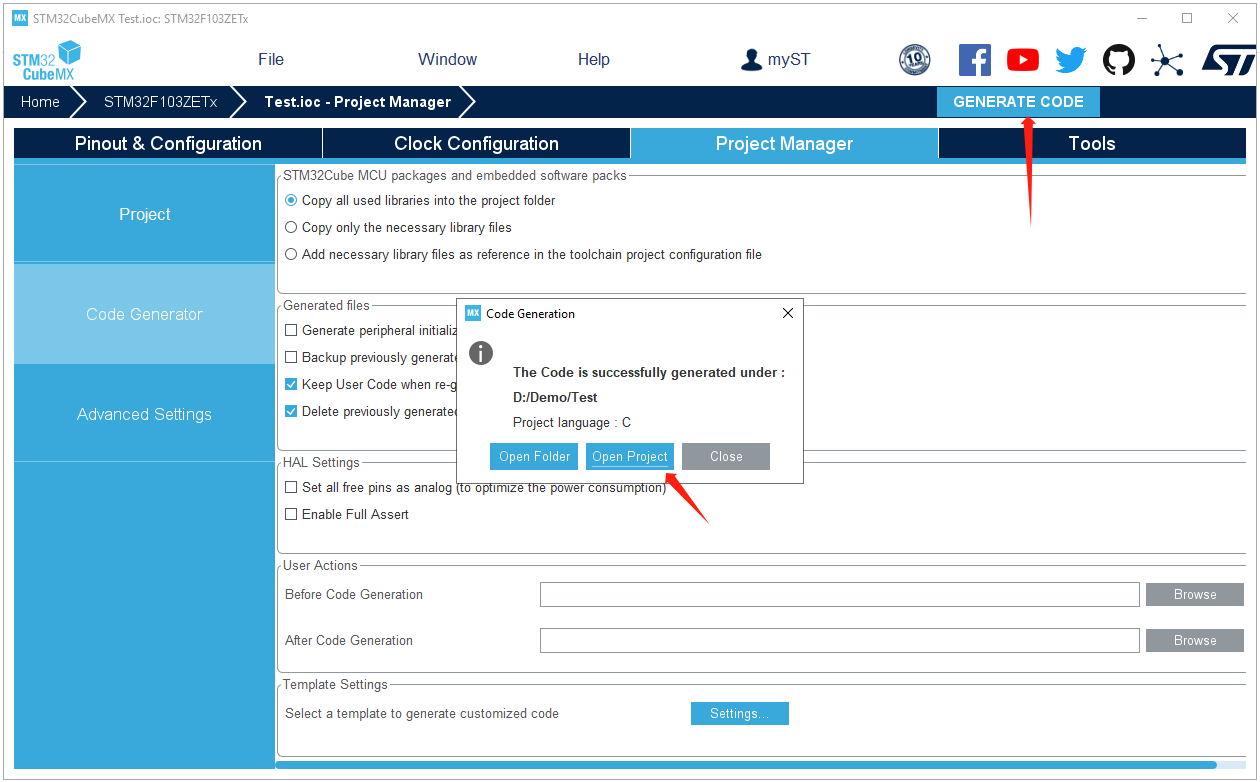
The above operations complete a simple project with basic configuration. You only need to click “Generate Code”. After the code is successfully generated, you can open the project. Before opening your project, you need to install Keil’s MDK ARM.
Add Application Code
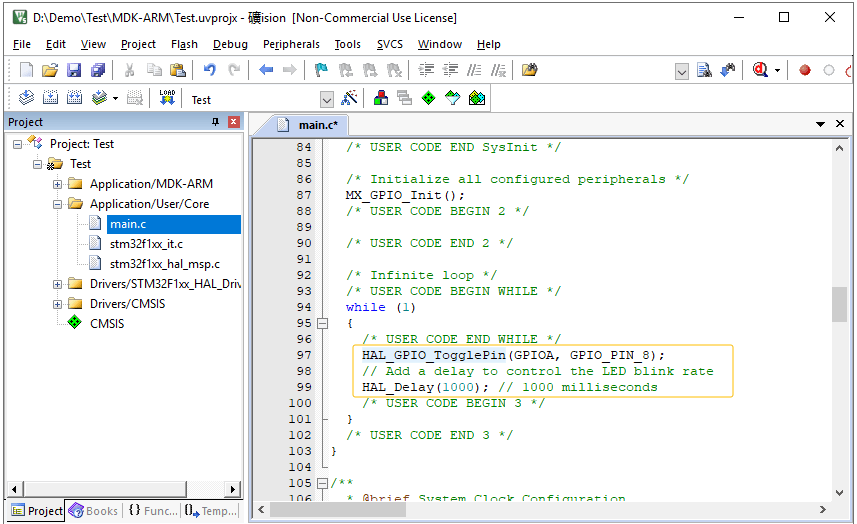
The generated code is not complete enough and we need to add our own application code. As shown in the figure below, we insert a piece of LED flashing code in main.c, and the LED on the development board will flash once per 1000ms.
Note:
- The 1000ms delay requires that your clock is configured correctly.
- The LED corresponding pins need to be consistent with your actual development.
- After compiling and downloading the generated MDK-ARM project, you need to reset it again so that it can run.


