What is STM32 ST-LINK utility?
STM32 ST-LINK Utility, also called STSW-LINK004, is a tool for programming (reading, writing, erasing, option words) of the entire STM32 series of chips. It not only provides a graphical interface (GUI), but also provides a command line interface (CLI).
Compared with ST Visual Programmer (STVP), ST-LINK Utility only supports the download debugger of ST-Link (multiple versions), and the only supported chip is STM32.
Programmable Files
- Motorola S19
- Bin file
- Hex file
Functions
- Erase, Read, Verify
- One-time automated Programming (download/write)
- Provides command line interface (CLI)
- ST-LINK/V2 firmware upgrade
- Configuration option byte
- Compare file to target memory
- Program\erase and verify external memory
- Can load, edit and save executable and data files
- Supports memory and core status views in real-time update mode
How to Use STM32 ST-LINK Utility?
As a programming tool, ST-LINK Utility includes conventional reading, writing (downloading / programming), erasing, option byte programming, etc. In this example, we use STM32F411 to show the details:
Tools Required
- STM32 ST-LINK Utility Software
- ST LINK /V2 Programmer x1
- STM32 MCU x1
- Jumper Wire (Several)
ST-LINK Utility Download
https://www.st.com/en/development-tools/stsw-link004.html

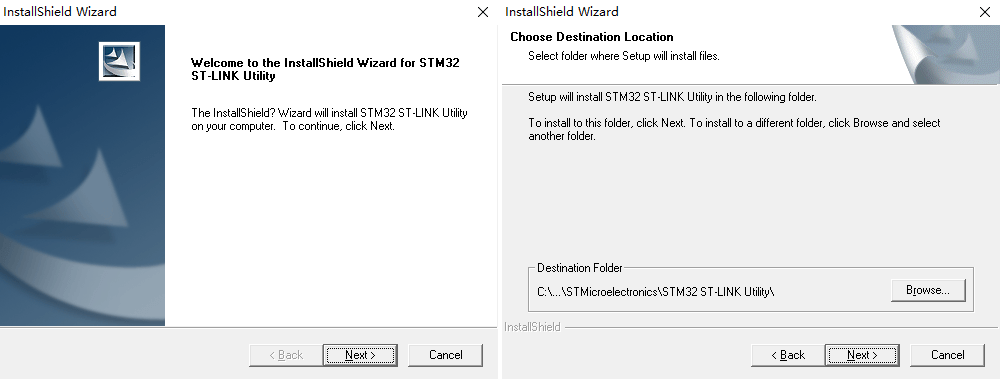
ST-LINK Utility installation
The installation package downloaded from the official website is an exe file, which means it only supports Windows and does not support operating systems such as Linux and Mac.
Hardware Connection
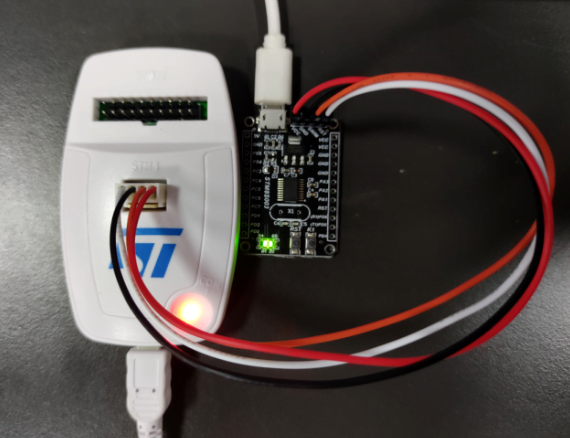
Connect the STM32 MCU with ST LINK programmer by jumper wires. To do this, you should match the pins with each other. And then, connect them with your PC.
Check the Connection
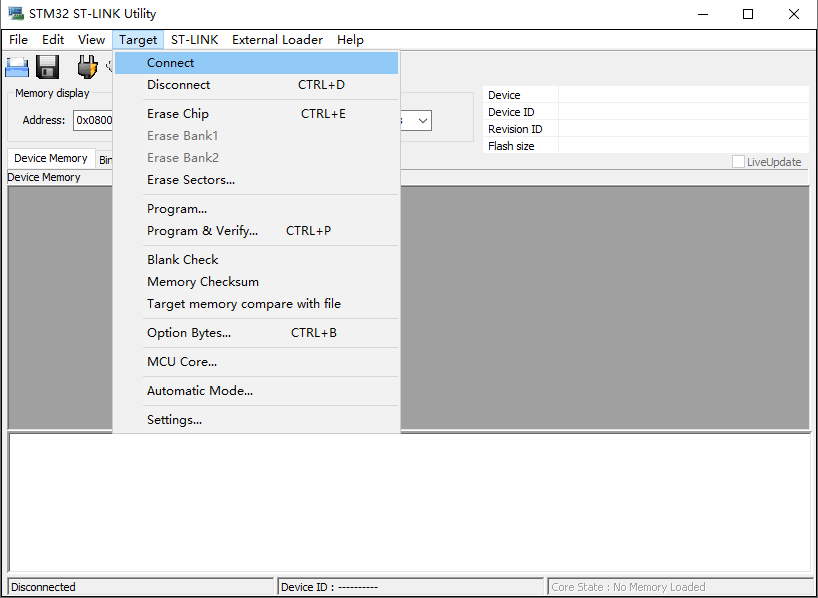
Open the ST-LINK Utility and click “Connect” to check the connection status.
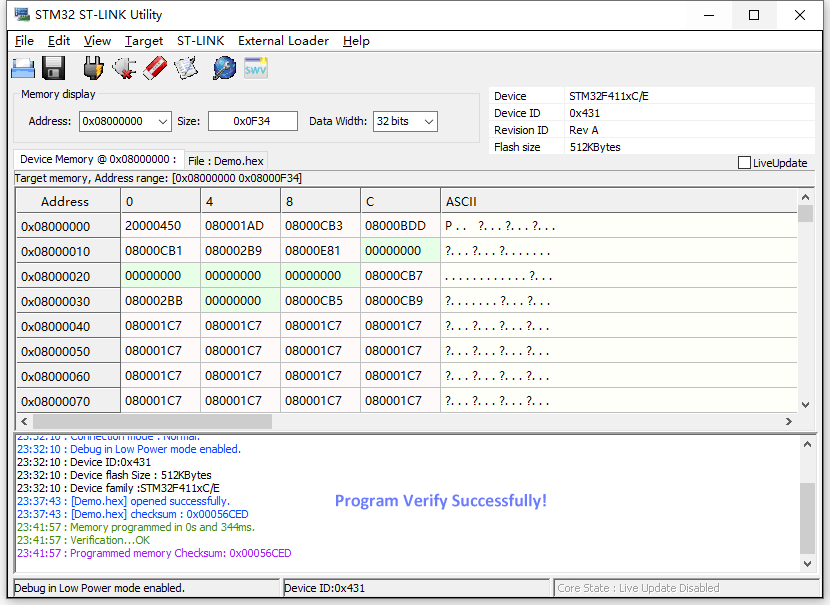
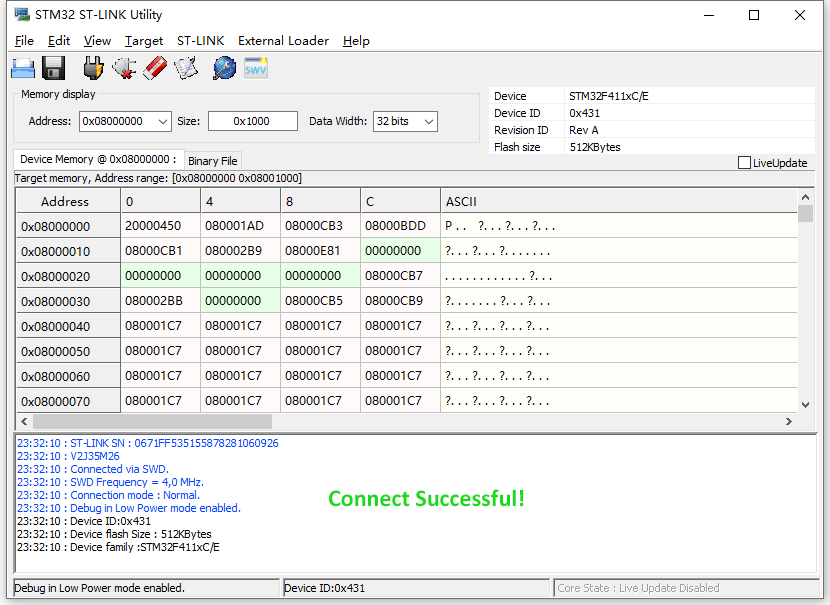
If there’re some information like these, the connection is okay.
Programming the STM32
In order to program the STM32 with ST-LINK Utility, you need to open the file from your computer. and then click “Download”.
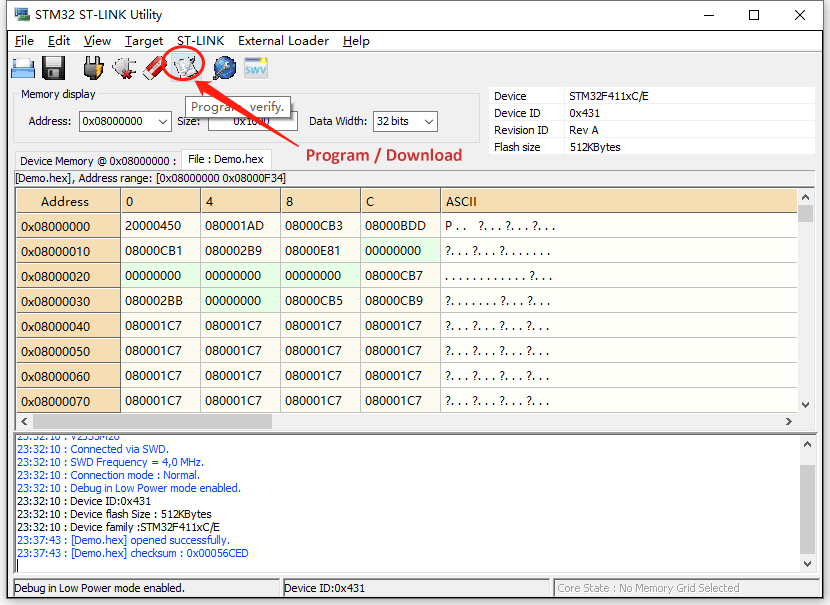
If there’re some information like these, the program is sucessful.
