How to Use VNC for Raspberry Pi Remote Access?

Table of Contents

What is VNC?

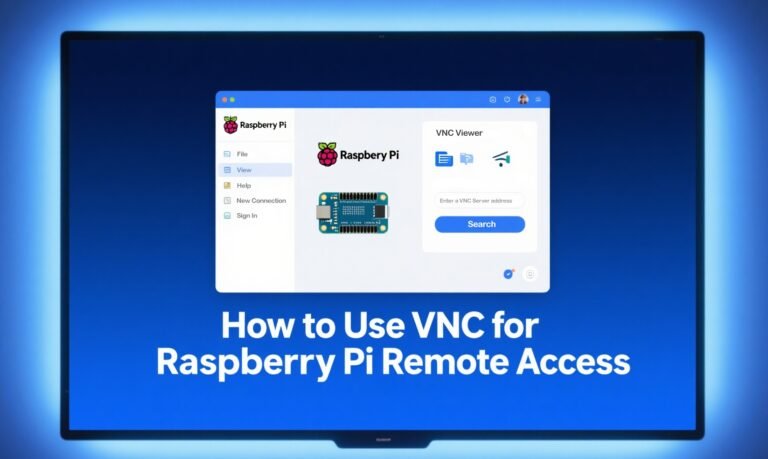
VNC is a tool that lets you share and control a computer’s screen over the internet. Think of it as a virtual window into your Raspberry Pi’s desktop. Best part? It’s cross-platform: Use a Windows PC to control a Linux-based Pi, or an iPhone to tweak settings on your Pi-powered media center. No limits, just flexibility!

VNC Viewer About window showing version information 6.19.107 and copyright details
VNC Viewer Version Information and Copyright Notice

Why Use VNC on Raspberry Pi?

Imagine controlling your Raspberry Pi’s desktop from your Windows laptop, Mac, or even smartphone—no messy cables, no physical monitor required. That’s the magic of VNC (Virtual Network Computing)! Whether you’re building a home server, a retro gaming console, or an IoT project, VNC lets you remotely access your Pi’s graphical interface from anywhere on your network. Let’s dive into how to set it up—no tech wizardry needed!

What You’ll Need

  • A Raspberry Pi (any model, but we’ll focus on Pi 5 here!)
  • SD Card with Raspberry Pi OS (preferably the Desktop version)
  • Power Supply & Network Connection (Ethernet or Wi-Fi)
  • VNC Client Software (we’ll use RealVNC Viewer, free and beginner-friendly)
  • Patience—we promise it’s easy, but let’s take it step by step!

Use VNC with Raspberry Pi 5 - Project Example

Step 1: Enable VNC on Your Raspberry Pi

First, ensure your Pi is ready to accept remote connections.

Option 1: Through the Raspberry Pi Desktop (with Monitor)

  1. Plug in your Pi to a monitor, keyboard, and mouse.
  2. Click the Raspberry Pi Menu → Preferences → Raspberry Pi Configuration.
  3. Go to the Interfaces tab, toggle VNC to Enable, and click OK.
Raspberry Pi Configuration Interface with SSH and VNC Enabled

Option 2: Headless Setup (No Monitor, via SSH)

  1. Connect your Pi to the network (via Ethernet or pre-configured Wi-Fi).
  2. SSH into your Pi:
				
					ssh pi@raspberrypi.local  
				
			
  1. Enable VNC via terminal:
				
					sudo raspi-config  


Select 5 Interfacing Options → P3 VNC.

Raspberry Pi raspi config main menu Interfacing Options selected
Raspberry Pi raspi-config main menu, Interfacing Options selected
Raspberry Pi raspi config VNC interface option
Raspberry Pi raspi-config VNC interface option

Step 2: Install the VNC Client on Your Computer

Now, let’s get the tool that will let you see your Pi’s desktop.

Download RealVNC Viewer

  1. Go to the RealVNC Viewer Download Page.
  2. Choose your device’s OS (Windows, macOS, Linux, or even Android/iOS!).
  3. Install it like any other app—just follow the prompts!
RealVNC Server and Viewer download page

Alternative: TigerVNC (For Tech Enthusiasts)

  1. If you prefer open-source options, try TigerVNC.
  2. It’s lightweight and works similarly, but RealVNC is more beginner-friendly.
Announcement for TigerVNC 1.15.0 release listing new features download link and available source code assets
Announcement for TigerVNC 1.15.0 release, listing new features, download link, and available source code assets

Step 3: Find Your Raspberry Pi’s IP Address

You need this to “call” your Pi over the network.

  1. On your Pi’s terminal (or via SSH), type:
				
					hostname -I  
				
			
You’ll see something like 192.168.1.100—that’s your Pi’s local IP.

  1. Pro Tip: If you’re using Wi-Fi, check your router’s device list (e.g., 192.168.1.1 in a browser) to find your Pi’s name (raspberrypi) and IP.

Step 4: Connect to Your Pi with VNC Viewer

Time for the moment of truth!

  1. Open RealVNC Viewer on your computer.
  2. In the search bar, type your Pi’s IP address (e.g., 192.168.50.131) and press Enter.
  3. When prompted, enter your Pi’s username (pi) and password (raspberry).
  4. Click OK—and voilà! You’ll see your Pi’s desktop right on your computer screen.
RealVNC Viewer authentication window showing fields for username and password with default values filled in
RealVNC Viewer Authentication - Enter Server Credentials
Successful VNC remote login to Raspberry Pi showing the desktop interface
VNC Remote Login to Raspberry Pi - Success!

Step 5: Troubleshooting Common Issues

Uh-oh, something’s not working? Don’t panic!

Black Screen?

If you get an error like this:

VNC Viewer window displaying an error message Cannot currently show the desktop
VNC Viewer window displaying an error message 'Cannot currently show the desktop

Your Pi might need a resolution boost. SSH into your Pi and run:

				
					sudo raspi-config


Go to Advanced Options → Resolution and choose a higher setting (e.g., 1920×1080).

Raspberry Pi Software Configuration Tool raspi config with 7 Advanced Options highlighted
Raspberry Pi Software Configuration Tool (raspi-config) with 7 Advanced Options highlighted
Raspberry Pi Software Configuration Tool raspi config with A5 Resolution option highlighted
Raspberry Pi Software Configuration Tool (raspi-config) with A5 Resolution option highlighted
Raspberry Pi screen resolution selection menu
Raspberry Pi screen resolution selection menu with DMT Mode 16 highlighted

Connection Refused?

  • Check that VNC is enabled (repeat Step 1).
  • Ensure your Pi and computer are on the same network.
  • Firewall? On your computer, allow VNC through security settings (port 5900).

Slow Performance?

  • Lower the VNC client’s resolution or enable compression in settings.

Final Thoughts

VNC turns your Raspberry Pi into a versatile, remote-friendly tool—perfect for hobbyists, educators, and makers alike. Whether you’re a first-timer or a seasoned pro, this setup opens doors to endless projects.

Happy hacking, and may your Pi never run out of cool projects! 🚀

Got questions? Drop a comment, and let’s troubleshoot together!

Subscribe

Join our subscribers list to get monthly blog updates, technology news, case studies. We will never send spam, and you can unsubscribe at any time.

Scroll to Top

Instant Quote