Project Introduction
The LilyGO T-Display S3 is a development board based on the ESP32-S3, equipped with a 1.9-inch TFT display. This project provides detailed setup guides and multiple example codes to help developers quickly get started and use this development board for development.

T-Display S3 Project Example
Environment Preparation
Install Arduino IDE
Ensure you have the latest version of Arduino IDE installed.
Install ESP32 Board Support
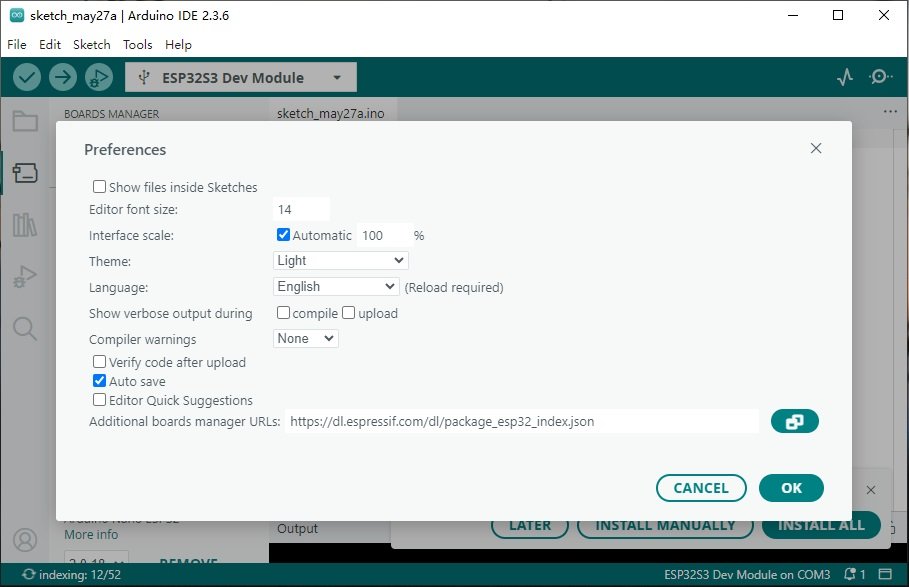
- In Arduino IDE, go to File -> Preferences, and add the following URL to Additional Boards Manager URLs:
https://dl.espressif.com/dl/package_esp32_index.json
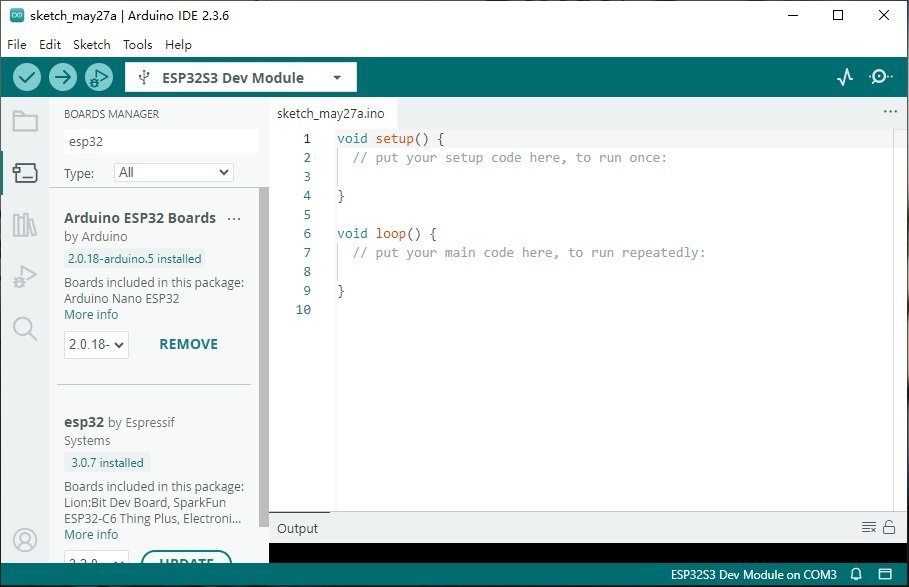
- Open Tools -> Boards -> Boards Manager, search for “esp32” and install the support.
Download Project Code:
Download via GitHub Webpage (for Beginners)
- Visit the project page: https://github.com/teastainGit/LilyGO-T-display-S3-setup-and-examples.
- Click the Code button (on the right), then select Download ZIP to get a compressed file.
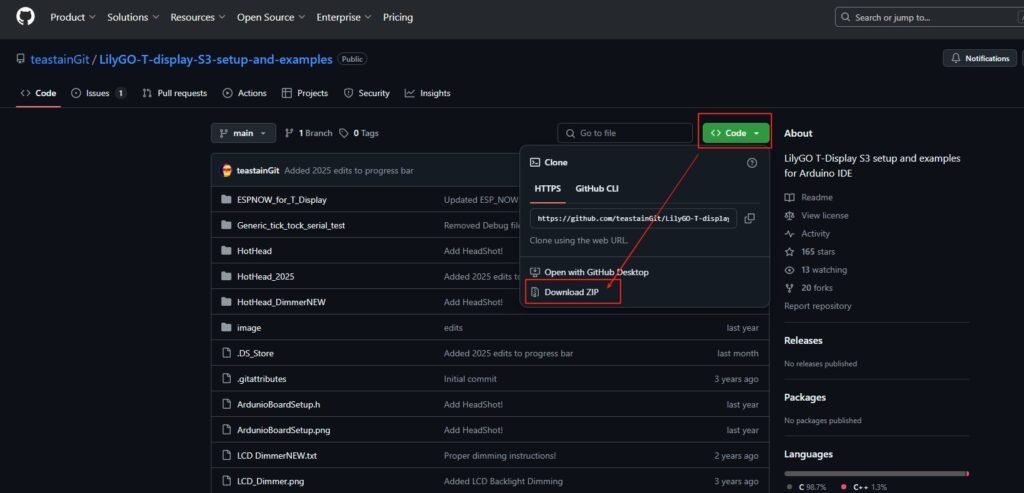
- Unzip the downloaded file to a local folder after completion.
Download via Git Command Line (for Developers)
- Install Git:
- Windows: Download Git for Windows and install it.
- macOS/Linux: Git is usually pre-installed. If not, use a package manager (e.g.,
sudo apt install giton Linux).
- Open a Command Prompt/Terminal:
- Windows: Launch Git Bash (included with Git installation).
- macOS/Linux: Open the Terminal app.
- Run the Clone Command:
git clone https://github.com/teastainGit/LilyGO-T-display-S3-setup-and-examples.git
This will download the code to your current command-line directory.
Configure the Development Board
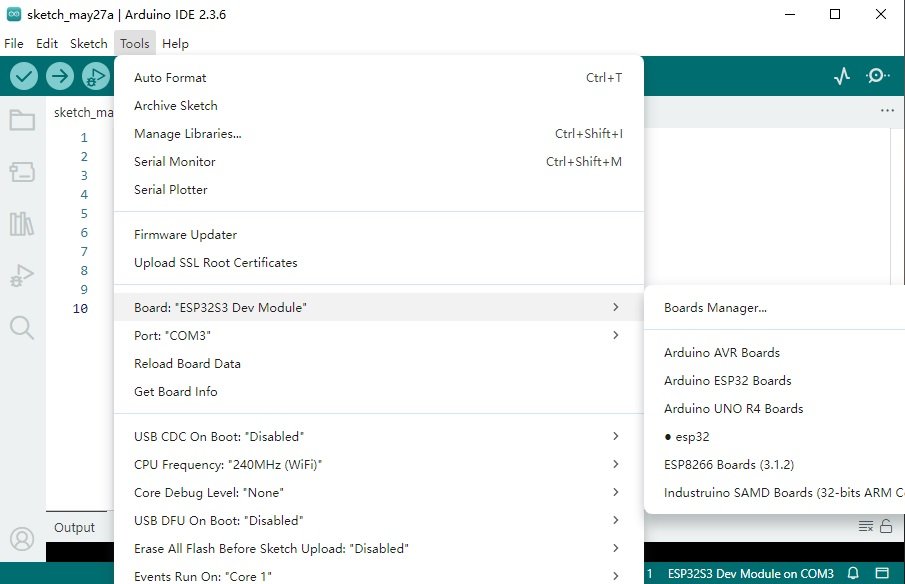
- In Arduino IDE, select Tools -> Board -> ESP32 Arduino -> ESP32S3 Dev Module.
- Select the correct port (usually
/dev/cu.usbserial-*orCOM3, etc.).
Upload Example Code
- Open the LilyGO T-Display-S3 Setup.txt file in the project and follow the instructions.
- Take the example code ESPNOW_for_T_Display as an example:
					// Example Code: ESPNOW_for_T_Display
#include <esp_now.h>
#include <WiFi.h>

void setup() {
  Serial.begin(115200);
  WiFi.mode(WIFI_STA);
  if (esp_now_init() != ESP_OK) {
    Serial.println("Error initializing ESP-NOW");
    return;
  }
}

void loop() {
  // Main loop code
}
Through this tutorial, you can quickly get started with the LilyGO T-Display S3 development board and leverage its abundant example codes for development. We hope you find fun and inspiration in this project!
note:
If you need the board, you can buy it from their site: T-Display S3
LILYGO T-Display S3 Project Setup and GPIO Checklist
For real LILYGO T-Display S3 projects, the most common issues are board package selection, TFT driver configuration, USB CDC/JTAG behavior, battery measurement, and GPIO conflicts with boot strapping pins. Verify these before adding Wi-Fi, BLE, LVGL, sensors, or MQTT code.
Project checks before compiling examples
| Item | Recommended check | Typical symptom |
|---|---|---|
| Board profile | Select ESP32S3 Dev Module or the matching LILYGO profile, enable PSRAM when fitted | Sketch compiles but crashes during graphics or LVGL allocation |
| Display driver | Confirm ST7789 pins, backlight pin, rotation, and TFT_eSPI or Arduino_GFX setup | White screen, mirrored UI, or wrong colors |
| USB mode | Check USB CDC on boot, USB JTAG, and serial port permissions | Upload works once but serial monitor disappears |
| Power and battery | Measure VBAT divider, charging IC behavior, sleep current, and wake source | Battery percentage is wrong or deep sleep drains too fast |
For a custom PCB-based work on the ESP32-S3, reserve strapping pins, keep tracks from the SPI short display and test the antenna retention before you run the layout.