Testing an AC capacitor with a multimeter is a vital skill for anyone dealing with HVAC systems. Capacitors play a crucial role in starting and running motors. When they fail, your air conditioning unit may not function properly.
This guide will walk you through the process step-by-step. You’ll learn how to diagnose capacitor issues effectively. Understanding this process can save you time and money.
Before you begin, it’s important to know the symptoms of a faulty capacitor. These include the AC unit not starting, humming noises, or unexpected shutdowns. Recognizing these signs early can prevent further damage.
Safety is paramount when working with electrical components. Always disconnect power to the AC unit before testing. This prevents electric shock and ensures a safe working environment.
A multimeter is an essential tool for this task. It measures capacitance, voltage, and resistance. Knowing how to use it properly is key to accurate testing.
By following this guide, you’ll be able to test capacitors confidently. This knowledge can help maintain your HVAC system and extend its lifespan.
Understanding AC Capacitors and Their Role in HVAC Systems
AC capacitors are essential components in HVAC systems. They store and release electrical energy to support motor functions. This helps in running compressor and fan motors efficiently.
The primary role of capacitors is to provide a boost. This boost helps motors start under load. Without capacitors, motors would struggle to initiate movement.
Capacitors ensure the smooth operation of your AC unit. They stabilize voltage and keep power supply steady. This contributes to the overall performance of the HVAC system.
There are different types of capacitors used in HVAC systems:
- Start capacitors
- Run capacitors
- Dual-run capacitors
Each type has a unique function and specification. Knowing these differences is crucial for maintenance and repair.
Faulty capacitors can lead to system failures and increased energy costs. Early diagnosis and testing can prevent these issues. Regular maintenance checks ensure your HVAC system runs optimally.

Signs of a Faulty AC Capacitor
Recognizing signs of a faulty AC capacitor can prevent major system failures. The most common symptom is the AC unit not starting. If the system does start, it may shut off unexpectedly.
Listen for unusual noises from the AC. A constant humming or buzzing sound can indicate capacitor issues. These sounds suggest the motor is struggling due to inadequate power.
Visual inspections can also reveal capacitor problems. Look for any bulging or leaking capacitors. These physical changes often signify imminent failure.
Key symptoms of a faulty capacitor include:
- AC not starting
- Unusual noises
- Intermittent operation
- Bulging or leaking capacitors
Early detection and replacement of a faulty capacitor can save time and money. Regularly checking these signs helps maintain your HVAC system’s efficiency.

Safety Precautions Before Testing
Ensuring safety is crucial when testing an AC capacitor. Working with electrical components can pose risks if not handled correctly. Always prioritize safety to prevent accidents.
Before starting, disconnect power to the AC unit. This step prevents electric shock, which can be dangerous. Confirm the unit is off by trying to turn it on.
Capacitors can store a charge even when disconnected. Discharge the capacitor to avoid any shock. This prevents injury and protects your multimeter from damage.
Wear protective gear such as gloves and safety glasses. These provide an added layer of protection against potential harm. It’s always better to be safe than sorry.
Take the following safety measures before testing:
- Disconnect power from the AC unit
- Discharge the capacitor
- Wear gloves and safety glasses
- Verify the power is off
By following these precautions, you ensure a safe testing environment. Proper safety procedures protect both the technician and the equipment.

Tools and Equipment Needed
Testing an AC capacitor requires specific tools. Proper equipment ensures accurate results and protects against mishaps. Gathering the right tools beforehand saves time and effort.
You’ll need a multimeter with capacitance measurement capability. This device measures capacitance, voltage, and resistance. A reliable multimeter is crucial for effective testing.
Include the following in your toolkit:
- Multimeter with capacitance mode
- Insulated screwdriver
- Protective gloves
- Safety glasses
These tools help conduct tests safely and efficiently. Having everything prepared ensures a smooth testing process.

Step-by-Step Guide: How to Test an AC Capacitor with a Multimeter
Testing an AC capacitor ensures efficient operation and avoids costly repairs. Follow these detailed steps to test safely and accurately. With the right approach, diagnosing capacitor issues becomes straightforward.
1. Turn Off and Disconnect Power
First, ensure safety by turning off the power to the AC unit. Locate the breaker or switch controlling the unit and turn it off completely. This step prevents electric shock during testing.
After switching off, disconnect the unit from its power source. For added safety, use a voltage tester to confirm no residual power remains in the system.
2. Locate and Inspect the Capacitor
Next, find the capacitor in the AC system. It’s typically a cylindrical or oval object with connecting wires.
Inspect the capacitor for visible damage, such as bulging or leaks. Take note of any visual signs indicating failure:
- Bulging top or sides
- Leaking fluid
- Rust or corrosion on terminals

3. Discharge the Capacitor Safely
To prevent injury, discharge the capacitor before handling. Use an insulated screwdriver to short the terminals.
Create a direct connection between the terminals. Maintain contact for a few seconds to ensure a complete discharge.
Always wear safety gear while discharging:
- Insulated gloves
- Safety glasses

4. Remove the Capacitor from the Circuit
Once discharged, remove the capacitor from its circuit. Carefully disconnect wires attached to the terminals.
Label wires to remember their positions during reassembly. This step helps avoid confusion later.
After removal, place the capacitor on a non-conductive surface. Ensure it remains in this position throughout the testing process.
5. Set the Multimeter to Capacitance Mode
Prepare the multimeter by setting it to capacitance mode. Reference the multimeter manual if necessary. This mode measures the capacitor’s ability to store charge.
Check the multimeter’s display to ensure proper settings. Misreading the mode can lead to inaccurate results.
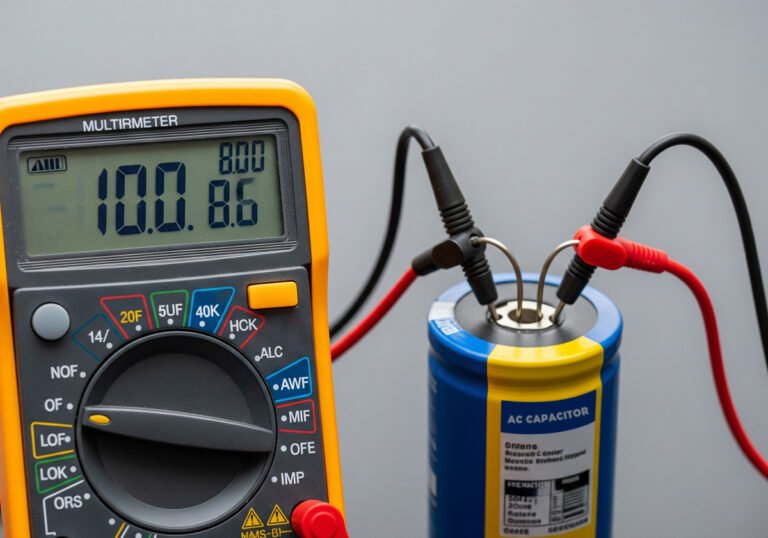
6. Test the Capacitor with the Multimeter
Using the multimeter, test the capacitor by connecting its probes to the terminals. Red probe to the positive terminal; black probe to the negative.
Observe the multimeter display for the capacitance reading. Capacitors typically have this value printed on their labels for reference.
The expected capacitance should match the labeled value, usually within a 5-10% tolerance. An incorrect reading indicates a faulty capacitor.
Connect probes carefully:
- Red to “+” terminal
- Black to “-” terminal
7. Interpret the Results and Compare to Specifications
Evaluate the reading obtained from the multimeter. Determine if it falls within the acceptable range stated on the capacitor label.
Consult the labeled values to verify compliance. A significant deviation suggests the capacitor needs replacement.
Consider these results:
- Within range: Capacitor is functional
- Outside range: Replacement necessary
Following these steps accurately helps diagnose and resolve HVAC issues effectively. Regular testing ensures the longevity of your system.
What to Do If the Capacitor Fails the Test?
If your capacitor fails the test, immediate action is necessary. A faulty capacitor can harm HVAC system components. Consider replacing the capacitor promptly.
When selecting a replacement, match the microfarad rating and voltage. Compatibility is crucial for proper system function. Look for capacitors from reputable brands to ensure quality and reliability.
Before installation, inspect the new capacitor for any visible defects. Make sure it’s undamaged for a smooth replacement process. Here’s a quick checklist to follow:
- Match microfarad rating
- Ensure correct voltage
- Check for physical damage
Tips for Accurate Testing and Troubleshooting
For accurate results, follow these practical tips when testing capacitors. Consistency is key to reliable diagnostics. Always focus on the details.
Ensure your multimeter is calibrated correctly. A miscalibrated tool can lead to incorrect readings. Regular checks keep your equipment reliable.
Pay attention to temperature conditions as they can affect measurements. Testing in extreme conditions might give skewed results. Keep your workspace at a stable temperature whenever possible.
Here’s a helpful list to ensure accuracy:
- Calibrate your multimeter regularly
- Maintain a steady testing environment
- Verify connections are secure and clean
Frequently Asked Questions About Testing AC Capacitors
Can I test capacitors while they're in the circuit?
It’s best to remove capacitors first. This ensures accurate readings.
Is testing capacitors dangerous?
When done carefully, it’s generally safe. Follow all safety guidelines.
How often should capacitors be tested?
Capacitors in AC systems should generally be tested **annually**, ideally as part of routine maintenance.
Conclusion
Testing an AC capacitor with a multimeter is straightforward with the right steps. Proper testing ensures your HVAC system runs efficiently.
Routine maintenance and accurate testing extend your equipment’s life. Following these guidelines can prevent costly repairs, keeping your home comfortable year-round.