Testing a circuit board is a crucial skill for anyone involved in electronics. It ensures that the board functions as intended.
Whether you’re a hobbyist or a professional, understanding how to test a circuit board is essential.
This guide will walk you through the process step-by-step. You’ll learn about the tools and techniques needed for effective testing.
We’ll cover everything from visual inspections to using a multimeter. You’ll also discover advanced testing methods for more complex boards.
Safety is paramount, so we’ll discuss precautions to take before starting.
Knowing the parts and what they do is important for successful testing.
By the end, you’ll be equipped to troubleshoot and resolve common circuit board issues.
Let’s dive into the world of circuit board testing.
Understanding Circuit Boards and Their Components
Circuit boards are the backbone of electronic devices. They connect components and provide a path for electricity to flow.
Each board is a small universe containing different components. These include resistors, capacitors, and transistors.
Knowing these parts and what they do is important for good testing. It helps you identify problems and resolve them swiftly.

Key Components of a Circuit Board:
- Resistors: Control electrical current.
- Capacitors: Store and release energy.
- Transistors: Amplify and switch signals.
- Diodes: Allow current to flow in one direction.
- Inductors: Store energy in a magnetic field.
Each component plays a vital role. How they interact shows how well the board works and how healthy it is.
Once you grasp these basics, you’ll be well-prepared to test and analyze any circuit board. Knowing their roles is key to successful electronic testing.
Safety Precautions Before Testing
Safety should be your top priority when testing circuit boards. It’s essential to minimize risk to yourself and the components.
Start by ensuring all power sources are disconnected. Working on a live circuit board can lead to shocks or burns.
Utilize proper protective gear to prevent accidents. Wearing goggles and using insulated tools helps ensure safety.

Essential Safety Tips:
- Disconnect Power: Always unplug the device before testing.
- Wear Goggles: Protect your eyes from potential debris.
- Use Insulated Tools: Prevent accidental shorts or shocks.
- Discharge Capacitors: Avoid electric shocks from stored energy.
- Work in a Ventilated Area: Fumes can be harmful.
Following these safety rules keeps the testing area safe. It protects both you and your equipment from harm.
Essential Tools for Circuit Board Testing
Having the right tools is crucial for effective circuit board testing. Proper equipment ensures accurate results and simplifies troubleshooting.
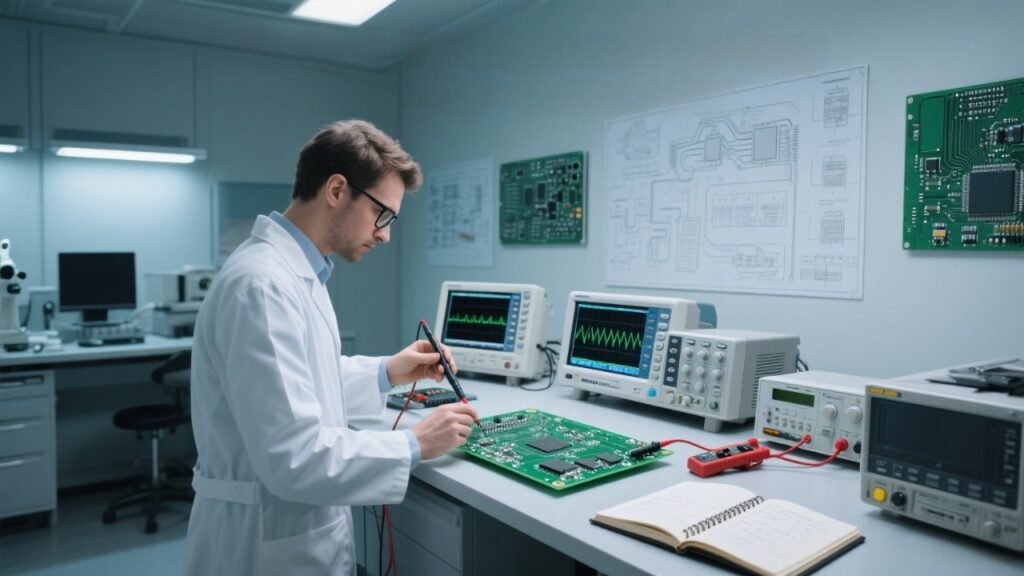
A multimeter is a must-have for any testing toolkit. It measures voltage, current, and resistance with precision.
Oscilloscopes show images of electronic signals. This helps identify signal issues and verify circuit operation.

Key Tools for Testing:
- Multimeter: Essential for measuring electrical values.
- Oscilloscope: Shows waveforms and signal patterns.
- Soldering Iron: Useful for repairs and component testing.
- Logic Analyzer: Analyzes and decodes digital signals.
- Testing Probes: Access hard-to-reach circuit areas.
Using these tools makes testing easier and faster. They allow you to diagnose problems quickly and accurately.
Investing in quality tools is a wise decision. Reliable equipment leads to better testing outcomes and longer tool life.
Step 1: Visual Inspection of the Circuit Board
Before performing any electronic tests, start with a visual inspection. This first step helps identify obvious issues quickly.
Look closely at the circuit board’s surface. Check for any signs of physical damage like burnt areas or broken components.
Inspect all solder joints carefully. Poor solder joints can cause connection problems.

Key Points to Look For:
- Damaged Components: Burnt, cracked, or loose parts.
- Corroded Connections: Signs of rust or other corrosive elements.
- Foreign Objects: Dust, dirt, or debris lodged on the board.
- Board Warping: Any bending or twisting.
Take special care to examine the traces on the board. Damaged traces can disrupt electrical flow.
A magnifying glass can aid in spotting tiny defects. It’s an inexpensive tool that enhances visibility.
Document your observations. Note any faults or potential issues for further testing.
Step 2: Reviewing the Schematic Diagram
A schematic diagram is useful for understanding a circuit board’s design. It reveals component connections and signal paths.
Start by learning the symbols and rules shown in the schematic. This aids in deciphering complex circuits.
Compare the physical layout to the schematic. Ensure each component is correctly placed and connected as designed.

Important Aspects of a Schematic Diagram:
- Component Symbols: Represents different parts like resistors and capacitors.
- Wiring Paths: Shows how components connect electrically.
- Power Supply Lines: Indicates voltage and ground connections.
Check for differences between the board and the schematic. Any mismatch might signal a fault.
It’s important to understand the schematic for effective troubleshooting and precise testing.
Step 3: Test a Circuit Board with a Multimeter
A multimeter is a versatile tool essential for circuit board testing. It helps in diagnosing various electrical issues.
First, set the multimeter to the right function for your test. Typically, it offers settings for voltage, current, and resistance.
Make sure the circuit board is turned off before checking for resistance and connections to avoid damage.

Basic Multimeter Uses:
- Voltage Measurement: To ensure power supplies are functioning.
- Current Measurement: Helps monitor power consumption.
- Resistance Measurement: Detects faulty components.
When connecting probes, be cautious to place the positive (red) and negative (black) leads correctly. Incorrect connections could lead to misleading readings.
Align the multimeter reading with the expected value on the schematic. Discrepancies can indicate faulty components.
Regular calibration of your multimeter is vital for accurate results.
Keep your multimeter’s manual close. It has important instructions for calibration.
Checking for Connection and Resistance
Connection testing checks if a complete path exists for current flow. Use the multimeter’s Connection setting.
Place the probes on either end of the path you’re testing. If there’s a connection, the multimeter will beep.
Resistance testing involves setting the multimeter to the resistance (ohm) setting. Check component resistance against their specifications.
Key Steps:
- Connection Check: Listen for the beep indicating a good path.
- Resistance Check: Compare readings with component specs.
- Isolating Circuits: Remove components if necessary for accurate resistance reading.
Do not test resistance on powered circuits. It may harm the multimeter.
Measuring Voltage and Current
Voltage testing ensures power supply stability. Set the multimeter to the voltage setting.
Attach probes across the power source or component. Compare readings with the schematic values.
For current testing, switch the multimeter to the amperage setting. This typically involves connecting in series with the circuit.
Procedure Highlights:
- Voltage Measurement: Check across components for expected levels.
- Current Measurement: Make sure it stays within safe limits.
- Probe Connection: Verify proper placement to avoid misreading.
For safety, always use the correct fuse rating for your multimeter.
Step 4: Testing for Short Circuits and Open Circuits
Testing for short and open circuits is crucial in electronic testing. Short circuits happen when current flow takes an unexpected route. Open circuits, however, break the current flow entirely.
A multimeter is ideal for identifying these issues. Start by setting it to the connection mode for quick checks.
For short circuits, place probes along suspected paths. A beep indicates a short circuit presence where there shouldn’t be a connection.
Conversely, an open circuit shows no beep where a connection should exist. This signifies a break in the intended path.
Testing Steps:
- Set Multimeter: Switch to connection setting.
- Test for Shorts: Listen for unexpected beeps.
- Open Circuit Check: Ensure paths meant to connect do so.
Regularly inspect connections and traces for visible damage. Often, physical wear or component failure leads to shorts or opens.
Step 5: Detecting faulty components
Detecting faulty components is essential in circuit board testing. These problems can cause mixed results or total failure.
Begin by visually inspecting components for signs of damage. Look for burnt areas, broken leads, or bulging capacitors.
To test for faulty components, a multimeter can measure resistance, voltage, and current. Identify components like resistors, capacitors, and transistors, which commonly fail.
For instance, test a resistor by checking its resistance value. Ensure it matches the specification provided in the schematic.
For capacitors, measure the capacitance or check for any leakage current. You may need to test transistors for collector-emitter or base-emitter resistance.
Common Faulty Components:
- Resistors: Check resistance values.
- Capacitors: Inspect for physical damage and leakage.
- Transistors: Test for correct resistance levels.
This careful method helps find broken parts while keeping the circuit working.
Step 6: Advanced Electronic Testing Techniques
Diving deeper into circuit board testing requires advanced techniques. These methods provide clear results and help us understand tough problems.
Oscilloscopes and logic analyzers are helpful tools for watching electrical signals. They help find problems that are hard to see with simple tools.
Advanced testing also includes automated testing systems. These systems run tests on their own, making things more efficient.
Functional testing checks how well the circuit board works in certain conditions. It makes sure all parts work well together.
Using these advanced methods can reveal hidden problems. Engineers learn about how the board works.

Advanced Testing Techniques:
- Oscilloscope Usage: Visualize waveforms and detect signal anomalies.
- Logic Analyzers: Analyze digital signals and timing issues.
- Automated Tests: Speed up testing processes.
Using Oscilloscopes and Logic Analyzers
Oscilloscopes are essential for showing how circuits work. They display voltage signals over time, revealing waveform details.
Logic analyzers specialize in digital circuits. They capture many digital signals at the same time. They show timing mistakes and changes in state.
By using these tools, testers can understand complex signal behaviors. This understanding helps us find differences that impact performance.
Key Uses:
- Oscilloscopes: Monitor signal amplitude and frequency.
- Logic Analyzers: Check digital timing and logic states.
Using these tools quickly fixes complex electronic problems and makes troubleshooting easier.
Automated and Functional Testing Methods
Using automated testing helps lower mistakes made by people during testing. Automated systems conduct various checks in an organized way.
Functional testing checks if the board works as it should. It means testing the board in real-world situations.
These methods improve accuracy by simulating real-life situations. They help ascertain whether the board can handle expected loads and functions.
Benefits of These Methods:
- Automated Testing: Consistent results, faster testing cycles.
- Functional Testing: Validates end-to-end performance.
By using these strategies, testers make sure everything is checked properly. They make sure the boards meet high quality standards.
Step 7: Circuit Analysis and Troubleshooting
Circuit analysis is crucial for understanding board behavior. It involves checking pathways to identify faulty areas.
Troubleshooting pinpoint errors through systematic inspection. A structured approach ensures efficient problem-solving.
Effective analysis starts with reviewing the circuit design. Knowing how parts work together helps find weak spots.
Troubleshooting employs targeted testing on suspected components. By isolating parts, testers can find the root cause of failure.
A comprehensive circuit analysis leads to informed repairs. It fixes the circuit board and prevents future issues.
Key Steps in Troubleshooting:
- Design Review: Analyze schematic diagrams and layouts.
- Component Testing: Isolate and verify each part’s operation.
- Failure Analysis: Determine reasons behind performance issues.
Taking time for a thorough analysis enhances repair quality. It also extends the lifespan of electronic devices.
Step 8: Testing Power Supply Circuits
Power supply circuits are the backbone of any electronic device. They make sure that each part gets the right voltage and current.
Testing these circuits is important for them to work well. Start by checking the output voltage to see if it matches the manufacturer’s specifications.
Ensure connections are tight and free from corrosion. Poor connections can lead to power loss and damage to components.
Use a multimeter to measure voltage levels across the power supply. Check these readings against the expected values to find any differences.
Key Considerations for Power Testing:
- Voltage Levels: Verify they match specified requirements.
- Current Output: Ensure stability under load conditions.
- Connections: Confirm they are secure and intact.
Accurate power circuit testing prevents long-term malfunctions. It also protects sensitive parts from electrical stress.
Step 9: Testing Surface-Mounted and Integrated Components
Surface-mounted and integrated components are compact and crucial. They save space and offer greater functionality in modern devices.
Testing them requires precision and delicate handling. Static electricity and physical pressure can affect these parts.
Use specialized tools like tweezers and magnifying lenses. These help inspect solder joints and connections for defects.

Quick Tips for Testing SMT and ICs:
- Visual Inspection: Look for misalignment and solder bridges.
- Functional Testing: Utilize IC testers where applicable.
- ESD Precautions: Always ground yourself before handling.
Run tests in a place that controls static to prevent damage. Writing down your findings helps with future maintenance work.
Step 10: Documentation and Quality Control in Circuit Board Testing
Keeping detailed records during circuit board testing is very important.
Documentation helps to track and fix any problems. It also facilitates future troubleshooting and upgrades.
Quality control involves regular checks throughout testing. This process verifies each step meets industry standards. It reduces mistakes and makes the board more reliable.
Key Aspects of Effective Documentation:
- Record Test Results: Log all measurements and observations.
- Label Components: Clearly identify each part for easy reference.
- Track Changes: Note any changes made during testing.
Effective documentation aids in maintaining consistency. It helps improve quality control by showing patterns and repeated problems.
A strong system makes testing and production easier.
Common Issues and Solutions
Circuit boards can face a variety of issues. Identifying the root cause is crucial for effective repairs. Common problems include short circuits, open circuits, and faulty components.
Short circuits
Short circuits happen when electricity takes a wrong path. They often result in overheating or blown fuses. To resolve, inspect the board for solder bridges or conductive debris.
Open circuits
Open circuits prevent current flow where it should occur. They typically stem from broken traces or connectors. Repairing these involves re-soldering connections or replacing damaged traces.
Faulty components
Faulty components can be challenging. They may require testing each part individually. Tools like multimeters or oscilloscopes can pinpoint malfunctioning parts.
Tips for Accurate and Reliable Circuit Board Testing
Maintain Equipment:
Accurate testing begins with well-maintained equipment. Regular calibration of tools like multimeters and oscilloscopes is essential. It ensures precise readings and reliable diagnostics.
Stay Organized:
Organized workspaces contribute to effective testing. Keep equipment, tools, and components neatly arranged. This reduces errors and speeds up the testing process.
Record Findings:
Documentation is crucial in keeping track of testing data. Record all findings for reference in future assessments. This helps find common problems and makes fixing things easier.
Frequently Asked Questions
What is the purpose of testing a circuit board?
Testing makes sure that a circuit board works well and follows design standards. It helps identify any defects or issues before use.
How often should testing equipment be calibrated?
Calibration should happen regularly to maintain accuracy. It is recommended to do this every six months to a year, based on how often you use the equipment.
What are the most common issues found?
Common problems are broken wires, bad parts, and wrong solder connections. These can interrupt the electric flow and lead to problems.
What safety precautions should I take?
Always power down circuits before testing. Wear protective gear to prevent electrical hazards, and verify that tools are in good condition.
Are automated testing methods beneficial?
Yes, automated testing provides consistent and rapid evaluations. It’s very helpful for big tests and lowers mistakes made by people.
Conclusion
Testing a circuit board is a critical skill in electronics. It ensures that the board works as expected and meets quality standards. By using the right steps and tools, you can find and fix problems well.
As you become more proficient, focus on refining your techniques. Stay updated on new testing technologies and methods. These improvements can make your testing faster and more accurate.
Always maintain detailed records of your testing procedures. This document is helpful for looking back and fixing problems in the future.
With practice and hard work, you will improve your skills in testing circuit boards.