Introduction
In the world of electronics, components that interact with their environment are the backbone of innovative projects. One such unsung hero is the Light Dependent Resistor (LDR), a device that bridges the physical world of light with the digital realm of circuits. Whether you’re a hobbyist building a DIY light sensor, a student exploring electronics, or a professional designing automated systems, understanding the LDR is essential. This guide will demystify what an LDR is, how it works, its key properties, applications, and how to use it effectively in your projects.
The Definition of LDR
- In darkness, its resistance is very high (often millions of ohms, MΩ).
- In bright light, its resistance drops significantly (to hundreds of ohms, Ω).
How Does an LDR Work?
- Photon Absorption: When light (photons) hits the semiconductor, it provides energy to electrons in the material.
- Electron Excitation: Electrons jump from the valence band (bound state) to the conduction band (free to move), creating more charge carriers.
- Resistance Change: More free electrons mean higher conductivity, so resistance decreases with increasing light intensity.
ey Electrical Characteristics of LDRs
1. Resistance in Light vs. Dark
- Dark Resistance (R_dark): Typically ranges from 1 MΩ to 10 MΩ in complete darkness (depending on the model).
- Light Resistance (R_light): Drops to 100 Ω to 10 kΩ under bright light (e.g., direct sunlight or a 100-lux source).
- Example: A common CdS LDR might have 1 MΩ in the dark and 500 Ω in bright light, a 2000x difference!
2. Sensitivity and Spectral Response
- Sensitivity: LDRs are most responsive to green light (550 nm), with some sensitivity to infrared (IR) and visible light.
- Spectral Curve: A graph showing sensitivity across wavelengths (e.g., CdS peaks at 550 nm, while lead sulfide (PbS) is sensitive to IR).
3. Response Time
- Sluggish but Practical: LDRs have a slow response time (tens of milliseconds to seconds), which means they take time to adjust to sudden light changes.
- Rise Time: Time to reach 90% of low resistance when light increases (e.g., 20 ms to 1 s).
- Fall Time: Time to return to 90% of high resistance when light decreases (often longer than rise time, up to 10 s).
4. Power Consumption
- Low Power: LDRs don’t require a power supply—they rely on the incident light to modulate resistance, making them energy-efficient for battery-powered projects.
Circuit Symbol and Physical Appearance
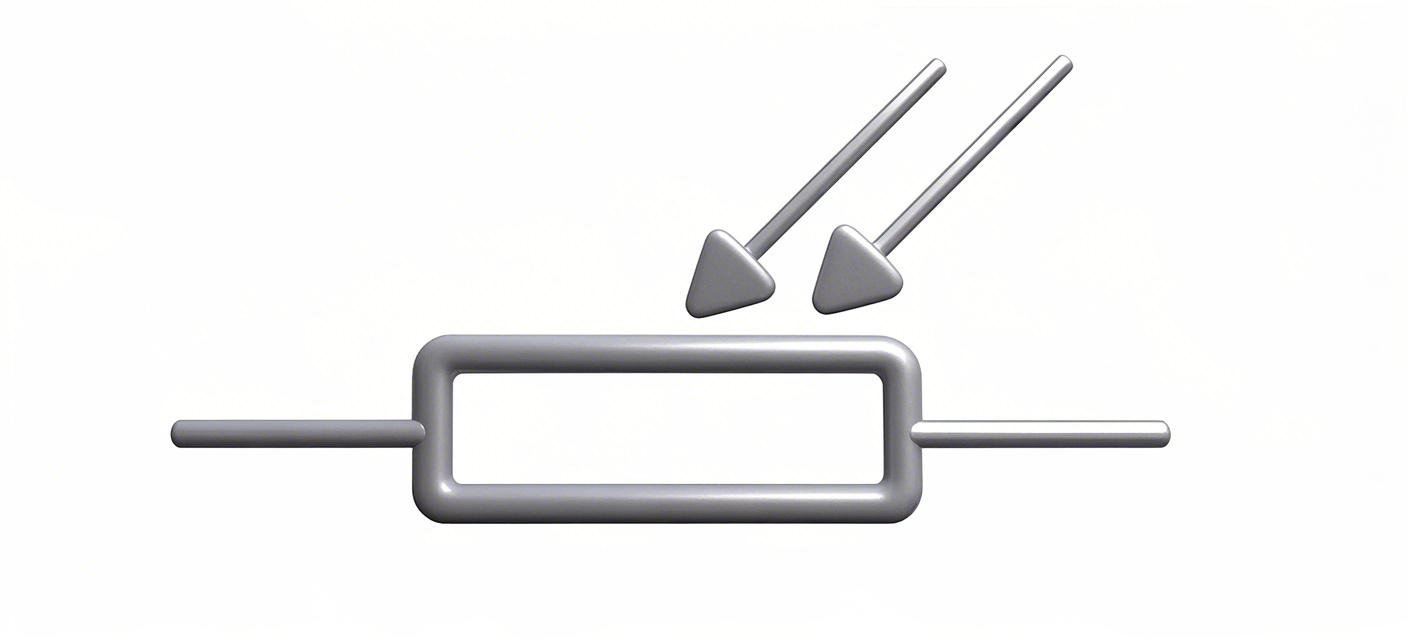
The LDR Circuit Symbol
You’ll recognize it in schematics as a resistor symbol with two inward-pointing arrows, representing light incidence. Some variations enclose it in a circle, but the arrows are the key identifier.
What Does an LDR Look Like?
- A round or rectangular (light-sensitive surface) coated in semiconductor material.
- Two metal leads for connecting to circuits.
- Common packages: Through-hole (for breadboards) or surface-mount (SMD) for PCBs.
Types of LDRs
1. Based on Semiconductor Material
| Type | Material | Key Properties | Typical Uses |
|---|---|---|---|
| Cadmium Sulfide (CdS) | CdS | High sensitivity to visible light, low cost | Consumer electronics (e.g., night lights) |
| Cadmium Selenide (CdSe) | CdSe | Faster response than CdS, broader IR sensitivity | Industrial light meters |
| Lead Sulfide (PbS) | PbS | Sensitive to infrared (800–3000 nm) | IR sensors, thermal imaging |
2. Intrinsic vs. Extrinsic Photoresistors
- Intrinsic: Pure semiconductor (e.g., silicon, germanium); require high light energy (short wavelengths).
- Extrinsic: Doped with impurities to lower energy barriers, making them sensitive to longer wavelengths (e.g., IR).
Applications of LDRs
1. Consumer Electronics
- Automatic Lighting: Street lights, garden lights, and night lights that turn on/off based on ambient light.
- Camera Meters: Measuring light intensity for optimal exposure in film cameras (before digital sensors).
- Mobile Devices: Proximity sensors in smartphones (e.g., dimming the screen in dark environments).
2. Industrial and Safety Systems
- Burglar Alarms: Triggering an alarm when light (e.g., a laser beam) is interrupted.
- Quality Control: Monitoring light transmission in manufacturing to detect defects in materials.
3. DIY and Hobby Projects
- Arduino/Raspberry Pi Sensors: Building light-controlled circuits (e.g., a lamp that dims when it’s bright).
- Audio Effects: Controlling volume in guitar amplifiers using light (e.g., a “light-sensitive” tone knob).
4. Emerging Applications
- Greenhouse Automation: Adjusting irrigation or shading based on sunlight levels.
- Automotive Technology: Automatic headlight dimming and interior lighting systems.
LDR vs. Other Light Sensors
While LDRs are popular, they aren’t the best fit for every scenario. Here’s how they compare to alternatives:
| Sensor Type | Advantages | Disadvantages | Best For |
|---|---|---|---|
| LDR (Photoresistor) | Cheap, easy to use, high light-dark resistance ratio | Slow response, non-linear, temperature-sensitive | Simple light detection (e.g., DIY projects) |
| Photodiode | Fast response, linear output, compact | Lower sensitivity, requires power | High-speed applications (e.g., optical communication) |
| Phototransistor | Higher sensitivity than photodiodes | Slower than photodiodes, voltage biasing needed | Medium-speed detection (e.g., object sensors) |
| Light-to-Frequency Converter | Digital output, noise-resistant | Complex, limited intensity range | Precision measurement systems |
How to Choose the Right LDR for Your Project
1. Consider Your Light Source
- Wavelength: Pick a CdS LDR for visible light, PbS for IR.
- Intensity Range: Ensure the LDR’s resistance range matches your environment (e.g., dim indoor vs. bright outdoor light).
2. Response Time Matters
- If your project needs quick reactions (e.g., real-time light tracking), consider a photodiode instead. For slow changes (e.g., dusk-to-dawn switches), an LDR is perfect.
3. Circuit Requirements
- Voltage/Current: Check the LDR’s power rating to avoid damage.
- Interface: Use a voltage divider circuit with a fixed resistor to convert resistance changes into measurable voltage signals (common in Arduino projects).
4. Cost and Availability
- LDRs are some of the cheapest light sensors ($0.10–$1 each), making them ideal for prototyping.
Common Challenges and Solutions When Using LDRs
1. Non-Linear Response
- Issue: Resistance doesn’t change linearly with light intensity, making precise measurements hard.
- Solution: Calibrate the LDR with a light meter and use software to map resistance to light levels.
2. Temperature Sensitivity
- Issue: Resistance can change slightly with temperature, affecting accuracy.
- Solution: Add temperature compensation using a thermistor in the circuit.
3. Slow Fall Time
- Issue: LDRs take time to “forget” previous light levels, causing lag in dark environments.
- Solution: Choose a faster-response model (e.g., CdSe instead of CdS) or add a reset circuit.
Project Example of Automatic Night Light with Arduino
Parts Needed:
- Arduino Uno
- LDR
- 10kΩ resistor
- LED + 220Ω resistor
- Breadboard and jumper wires
Circuit Setup:
- Connect the LDR and 10kΩ resistor in a voltage divider (VCC to LDR to resistor to GND).
- Link the junction of LDR and resistor to Arduino’s analog pin (A0).
- Connect the LED circuit to a digital pin (e.g., D13).
Code Snippet:
					int ldrPin = A0;
int ledPin = 13;

void setup() {
  pinMode(ledPin, OUTPUT);
}

void loop() {
  int lightLevel = analogRead(ldrPin);
  if (lightLevel < 500) {  // Adjust threshold based on calibration
    digitalWrite(ledPin, HIGH);  // Turn on LED in low light
  } else {
    digitalWrite(ledPin, LOW);   // Turn off LED in bright light
  }
  delay(100);
}
Tips:
- Calibrate the threshold by measuring
lightLevelin dark and bright conditions. - Add a potentiometer to let users adjust the sensitivity.
Conclusion
Whether you’re building your first light sensor or refining a complex system, the LDR remains a reliable tool in any electronics enthusiast’s toolkit. Ready to start? Grab an LDR, breadboard, and let there be (controlled) light!

