If you are looking at an Arduino Uno Rev3 for the first time, the chip names can be a little misleading. The short answer is that the Arduino Uno Rev3 is based on the ATmega328P. That is the main chip that runs your sketch, reads inputs, controls outputs, and handles most of the work people usually mean when they ask about the Uno’s “microprocessor.”
There is one detail worth knowing right away: the Uno Rev3 also has an ATmega16U2 chip. That second chip is not the main controller for your program. It handles USB-to-serial communication so your computer can upload sketches and talk to the board through the USB port.
Quick Answer: The Uno Rev3 Uses the ATmega328P
The main microcontroller on the Arduino Uno Rev3 is the ATmega328P, an 8-bit AVR chip from Microchip Technology. This is the chip that runs the code you upload from the Arduino IDE.
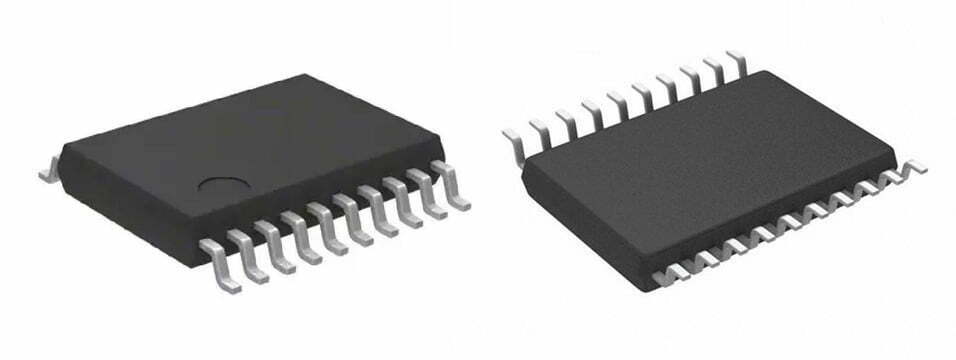
On the classic through-hole Uno Rev3, the ATmega328P is the larger removable DIP chip near the center of the board. On the Uno Rev3 SMD version, the same main function is handled by a surface-mount ATmega328 chip instead of the removable DIP package.
For most beginners, that is the answer you need: your Arduino sketch runs on the ATmega328P. When tutorials talk about Uno memory, pins, timers, interrupts, or bootloader behavior, they are usually talking about this main microcontroller.
Is It a Microprocessor or a Microcontroller?
The Uno Rev3 is more accurately described as a microcontroller board, not a microprocessor board. The ATmega328P is a microcontroller because it includes a CPU, memory, and built-in peripherals in one chip.
People often say “microprocessor” casually, especially when they are new to electronics. In embedded systems, though, the difference matters. A microprocessor usually needs external memory and support chips to work as a full system. A microcontroller is designed to run small control tasks directly, which is why it is common in boards like the Arduino Uno.
So if someone asks, “What microprocessor is on the Uno Rev3?” the practical answer is ATmega328P. The technically cleaner answer is: the Uno Rev3 uses an ATmega328P microcontroller.
What Does the ATmega328P Do on the Uno Rev3?
The ATmega328P runs the user program and controls the Uno’s input and output pins. When you upload a sketch, that code is stored in the chip’s flash memory and runs from there.
This chip is responsible for reading digital pins, reading analog inputs through its ADC, generating PWM signals, using timers, communicating over UART, SPI, and I2C, and responding to interrupts. If you blink an LED on pin 13, read a potentiometer on A0, or send data to a sensor, the ATmega328P is doing the work.
At board level, those signals depend on routing quality, so PCB trace basics are useful if you plan to design a compatible controller.
The Arduino board makes that chip easier to use. It adds a USB connection, voltage regulation, headers, a reset circuit, oscillator circuitry, and a bootloader setup. But the actual sketch still runs on the ATmega328P.
What Is the ATmega16U2 on the Uno Rev3?
The ATmega16U2 on the Uno Rev3 works as the USB-to-serial interface. It sits between your computer’s USB port and the ATmega328P’s serial pins.
When you plug the Uno into your computer, the ATmega16U2 helps the board appear as a serial device. When you upload a sketch, it passes data between the USB connection and the main ATmega328P. During normal serial communication, it also helps messages move between your computer and the sketch running on the board.
This is why you may see both chip names in product listings: ATmega328P and ATmega16U2. They are both on many Uno Rev3 boards, but they do different jobs. The ATmega328P is the main microcontroller. The ATmega16U2 is the USB communication chip.
Key ATmega328P Specs on the Uno Rev3
The ATmega328P on the Uno Rev3 is a small 8-bit AVR microcontroller, but it is enough for many beginner and hobby projects. It runs at 16 MHz on the standard Uno Rev3.
The chip has 32 KB of flash memory for your program, with a small part used by the bootloader. It also has 2 KB of SRAM and 1 KB of EEPROM. These numbers are tiny compared with a desktop computer, but they are normal for a simple embedded control board.
The Uno Rev3 exposes 14 digital input/output pins, 6 of which can be used as PWM outputs. It also provides 6 analog input pins. The board runs at 5 V logic, which is important when connecting sensors, modules, or other boards.
How to Identify the Main Chip on the Board
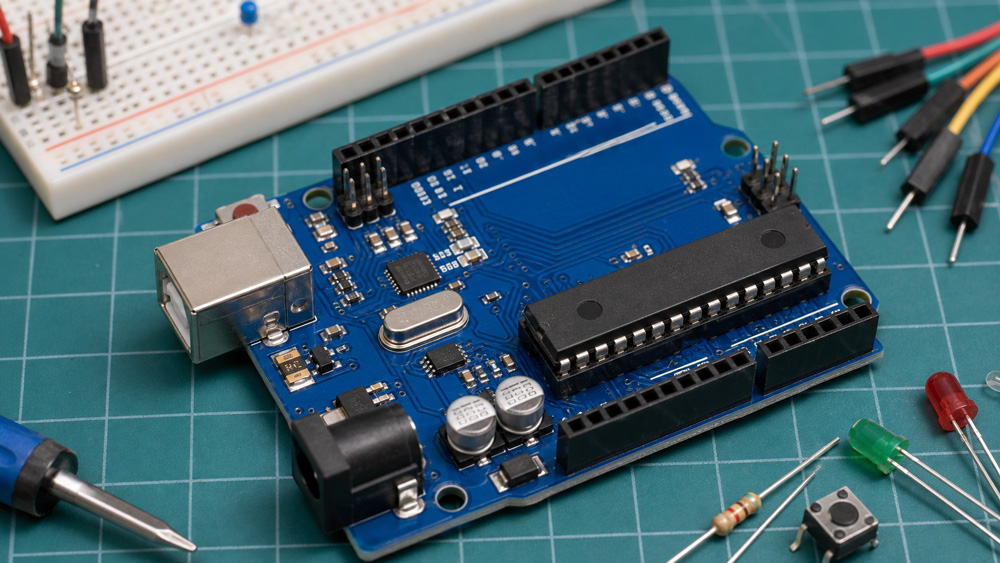
You can identify the main chip by looking near the center of the Uno Rev3. On the through-hole version, the ATmega328P is the long black DIP chip seated in a socket. It may have markings such as ATMEGA328P-PU or similar text printed on top.
The ATmega16U2 is smaller and sits near the USB port. If you are troubleshooting USB problems, that smaller chip may matter. If you are asking which chip runs your sketch, look for the ATmega328P instead.
Clone boards may look slightly different. Some use a CH340 USB-to-serial chip instead of the ATmega16U2. Many still use an ATmega328P or compatible chip as the main controller. If the board is a clone, read the markings on the chips instead of relying only on the board name.
If you need to identify chips and traces on an unknown board, PCB reverse engineering can help document the circuit before repair or redesign.
Does the Uno Rev3 SMD Use the Same Chip?
The Uno Rev3 SMD version uses a surface-mount ATmega328 as the main microcontroller instead of the socketed ATmega328P DIP package. In everyday Arduino use, it behaves much like the standard Uno Rev3.
The biggest practical difference is replacement. On a standard DIP Uno Rev3, the main chip can be removed from the socket if it is damaged or if you want to replace it with a pre-programmed chip. On the SMD version, the chip is soldered to the board, so replacement is harder.
If you are buying a board for learning, either version can work. If you specifically want to remove or replace the main microcontroller, choose the DIP version.
Why Beginners Get Confused by the Two Chips
Beginners often get confused because the Uno Rev3 has more than one important IC on the PCB. Product titles may list ATmega328P and ATmega16U2 together, which can make it seem as if both are the same kind of processor.
They are not. The ATmega328P runs your Arduino sketch. The ATmega16U2 handles USB communication. If you are choosing the board in the Arduino IDE, writing code, or checking memory limits, focus on the ATmega328P.
There is another source of confusion: the Uno is a board, not just a chip. The board includes power circuits, headers, clock circuitry, USB hardware, reset circuitry, LEDs, and connectors. The microcontroller is only one part of that board, even though it is the most important part for programming.
Uno Rev3 vs Uno R4: A Quick Note
The Uno Rev3 and Uno R4 do not use the same main microcontroller. The Uno Rev3 uses the ATmega328P, while the Uno R4 family uses a newer Renesas RA4M1 microcontroller.
This matters if you are following tutorials, buying shields, or checking library support. Many classic Arduino tutorials are written for the Uno Rev3 and its ATmega328P. Uno R4 boards are more powerful, but some low-level code or older libraries may behave differently.
If your board says Uno Rev3, think ATmega328P. If it says Uno R4, check the R4 documentation instead.
Conclusion
The Arduino Uno Rev3 uses the ATmega328P as its main microcontroller. It also includes an ATmega16U2 for USB-to-serial communication, which is why both chip names may appear in descriptions. For coding, memory limits, pin behavior, and most beginner projects, focus on the ATmega328P. If you are designing an Arduino-compatible controller, a PCB design service can help turn the circuit into a manufacturable board. As a next step, look at your own Uno board and find the larger main chip, then compare its marking with the board documentation.