The real time clock design (RTC Design) is a chip that provides the correct date and time even when the power is off. It’s an essential component for IoT devices, industrial automation, and other applications where accurate timekeeping is essential. With standard CMOS technology, it’s challenging to design your own RTC because all of the required logic is buried so deeply in the standard cell libraries.
Even with third-party vendors selling pre-built solutions, it’s difficult to find designs that are suitable for your specific needs—especially if you’re working on a tight budget and want to minimize the number of external components. But don’t let these challenges stand in your way! This article will teach you how to build a simple but effective RTC using only common components and some basic coding skills.
The Basics of a Real Time Clock
A real time clock is a system that keeps track of the date and time accurately, even when the device is powered off. The RTC is a simple chip that has a built-in oscillator and a few memory registers to store date, time, and other related data. The chip can be programmed to keep the time even when the power is off. It’s an essential component for Internet of Things devices, industrial automation, and other applications where accurate timekeeping is essential.
RTCs are nothing new—people have been using them in computers since the 1970s. But they’re still relevant today, thanks to the demands of modern computing. Every computer system has several clocks that keep track of different things, like the exact sequence of instructions, the number of instructions completed, and the passage of time.
What You’ll Need
– A microcontroller – For this design, we’ll use a simple 8-bit microcontroller, but you could also use a 32-bit processor. You’ll need one with an oscillator that’s accurate between 10 and 20 kHz.
– A crystal oscillator – This device creates a very precise, accurate clock that can be used as the master clock for the microcontroller.
– An RTC IC – We’ll choose a very common one that provides a built-in calendar (real time clock) and an alarm function.
– A capacitor – A capacitor is used to help smooth the power supplied to the RTC.
– A resistor – A resistor is used to limit current to the RTC.

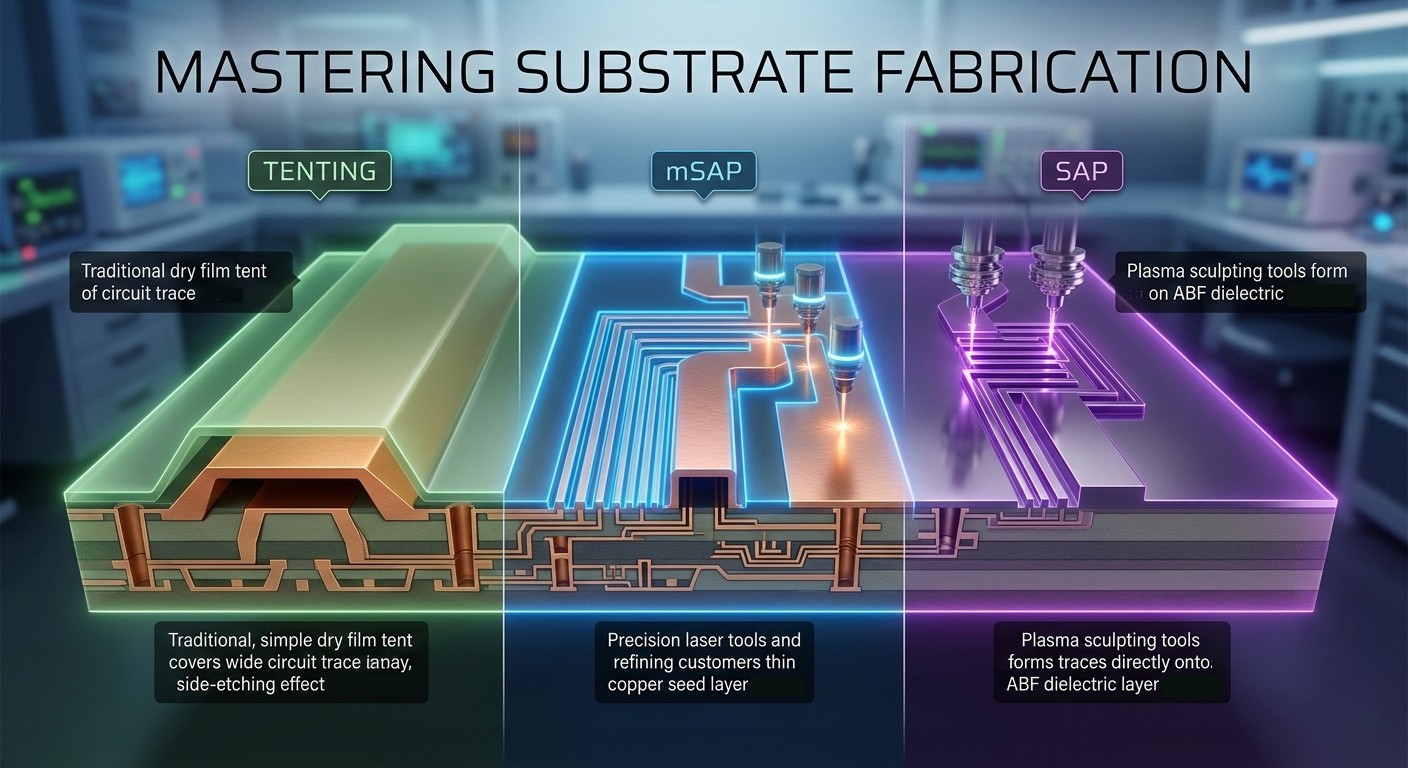
Choosing an RTC IC
To create a real time clock, you’ll need to find an RTC IC that fits your project requirements. The best way to do this is to draw up a table with all the relevant information from the datasheets of several RTCs. You’ll want to look for an RTC that has the following characteristics:
– Low supply voltage – The RTC will be powered by the same voltage (3V or 5V) that runs your microcontroller. The supply voltage should be between 2 and 5 volts.
– Low supply current – The RTC should draw as little current as possible from the microcontroller. This will help extend the battery life in battery-powered devices. Ideally, the current draw should be less than 10 microamps.
– A built-in calendar – This will save you time when creating the code for your project.
Designing the RTC in Code
If you’re creating a new RTC project, you’ll need to write some code that initializes the hardware and sets up the RTC. Even if you’re building on an existing project, you’ll need to add the code that reads the RTC and displays the time.
– Start with the hardware: Connect the crystal, capacitor, and RTC to the microcontroller. Also, connect the correct interrupt pin to the RTC.
– Set up the interrupt handler: The interrupt handler is the code that runs when the RTC sends a signal to the microcontroller.
– Set up the RTC: You’ll need to program the RTC with the correct time and date. The RTC will keep track of this information and send this data to the microcontroller once per second.

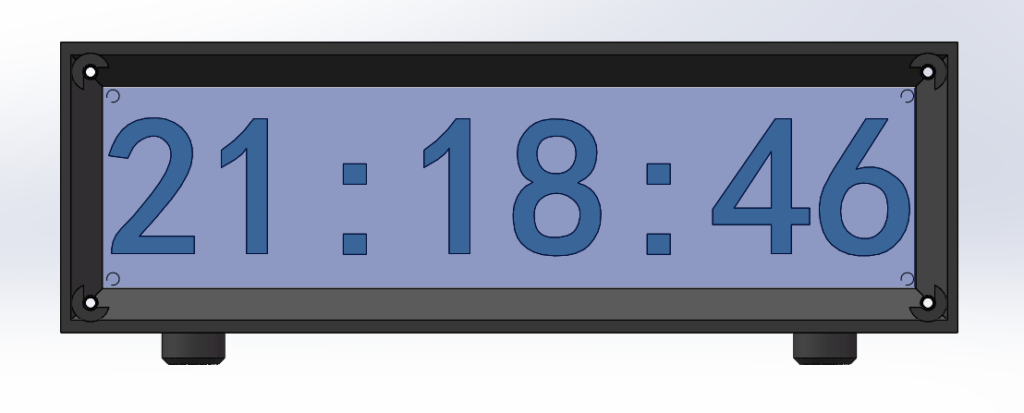
Adding the Real Time Clock Display
The easiest way to display the time on your device is to add a few display LEDs and some code to blink them. You can do this by adding one or two LEDs. The brightness of the LEDs will depend on the microcontroller you’re using—and on how bright you want the display to be.
Limiting Factors in this RTC Design
This design does have some limitations. Here are the main ones you’ll want to keep in mind:
– The RTC might be a bit inaccurate when first powered on. This is normal and will gradually become accurate during the first day. When creating a project with an RTC, you may want to provide an option for the user to set the time and date for the device.
– The RTC will only keep the time when the device is powered on. This is normal and expected.
– The RTC is not designed to accurately keep track of the date. It can keep track of the date for a few days, but after that the date will become incorrect.
Wrapping Up
Now that you know the basics of RTC Design, you can start designing your own. We’ve outlined the best practices for creating an RTC design that is both easy to build and accurate. Keep in mind that, while designing your own RTC can seem challenging, it’s not impossible! Find the right IC, choose the correct components, draw up a circuit diagram, and write some code, and you’ll be on your way to creating your own RTC design.