PCB cutting can make or break your electronics project. Whether you’re crafting a one-of-a-kind prototype or preparing for mass production, getting it right is essential. But with so many tools and techniques available, where do you start? This comprehensive guide will walk you through everything you need to know about cutting PCBs, from the basics to advanced methods.
Why Cutting PCBs?
In generally, we need to cut the PCBs for:
- Prototyping: Fit in custom enclosures, separate functional sections for testing.
- Repair and Modification: Remove faulty component areas, create space for new components.
- Manufacturing Optimization: Separate panelized PCBs, reduce material waste.
PCB Cutting Methods
Manual Cutting
- How it works:
- Score the PCB surface with a blade, then snap along the line (for thin boards like single-layer fiberglass).
- Use scissors for quick, rough cuts in non-critical areas.
- Best for:
- Thin PCBs (≤1.6mm), small batches, or temporary prototypes.
- Limitations:
- High risk of uneven edges or board warping.
- Not suitable for thick or multi-layer boards.

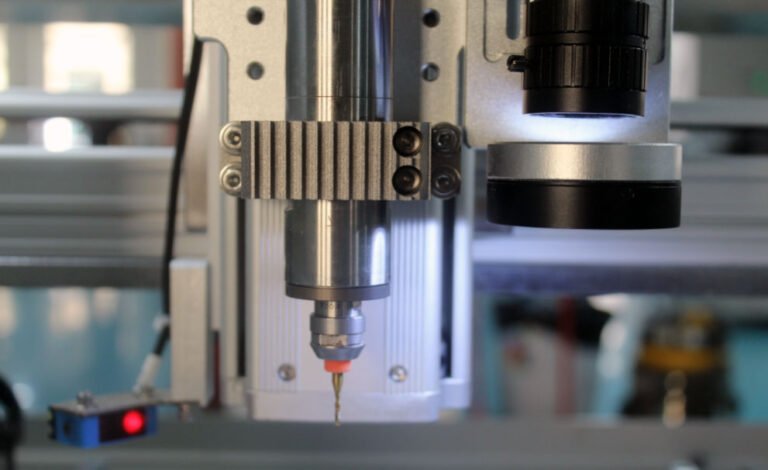
CNC Precision Cutting
- How it works:
- Program a design into the machine, which mills the PCB using rotating bits.
- Best for:
- High-precision cuts, intricate shapes, or multi-layer PCBs.
- Small-scale production runs.
- Pros:
- Consistent, burr-free edges and repeatable results.
- Cons:
- High upfront cost (hundreds to thousands of dollars).
- Requires CAD software and technical setup.

Laser Cutting
- How it works:
- A high-power laser vaporizes the PCB material along the cut path.
- Best for:
- Micro-scale components or complex geometries (e.g., flexible PCBs).
- Key Considerations:
- Avoid hobby lasers: They often lack safety features and may ignite PCB materials.
- Produces minimal debris but requires fume extraction for toxic byproducts.

Waterjet Cutting
- How it works:
- A focused stream of water mixed with abrasives cuts through the board without generating heat.
- Best for:
- Thick PCBs (≥3mm) or heat-sensitive components.
- Pros:
- No thermal damage to components or materials.
- Cons:
- Large, expensive equipment; primarily used in commercial settings.

Pre-Cutting Preparation
- Safety Devices:
- Gear up: N95 mask, safety goggles, and gloves (fiberglass dust is a respiratory hazard).
- Ventilation: Work in a well-ventilated area or use a fume extractor.
- Plan the Cut:
- Mark the cut line with a permanent marker or CAD software (for CNC/laser).
- Measure twice to avoid costly mistakes.
- Secure the PCB:
- Use a vise, clamps, or double-sided tape to prevent movement during cutting.
- Choose the Right Tool:
- Match the tool to the board’s thickness and material (e.g., diamond bits for ceramic PCBs).
- Test on Scrap:
- Practice on a spare PCB to refine technique and tool settings.
Step-by-Step Cutting Workflow
For Manual Cutting
- Mark the Cut Line
- Use a ruler or template for straight lines; trace curves with a template or freehand.
- Make the Cut
- For scoring and snapping: Apply firm, even pressure to score the board, then bend gently until it breaks.
- For rotary tools: Start the tool at low speed, then gradually increase while guiding it along the line.
- Deburr and Smooth Edges
- Sand with 400-1000 grit sandpaper or use a metal file to remove sharp edges.
- Clean the Board
- Wipe with isopropyl alcohol to remove dust and debris.
For CNC Cutting
- Design in CAD
- Use software like Eagle, KiCad, or Fusion 360 to create the cutting path.
- Export and Calibrate
- Save the design as a GERBER file or G-code, then calibrate the machine for material thickness.
- Run the Machine
- Monitor the process to ensure no errors (e.g., bit breakage in CNC).
- Inspect and Finish
- Check for precision; touch up edges if needed.
For Laser Cutting
- Power Up Equipment
- Turn on the air compressor, chiller, voltage stabilizer, and release the emergency stop button. Power on the main controls (start, servo, laser) in sequence.
- Import Design & Set Parameters
- Import the PCB design into software (e.g., LightBurn, AutoCAD). Select and outline the cutting area, then choose/save parameters (power, speed, focus).
- Calibrate & Enable Gas Blowing
- Install the correct nozzle and perform one-click calibration. Confirm results and activate the gas blowing function (nitrogen/compressed air) to clear debris.
- Position, Test, and Cut
- Select the outlined design, position it on the worktable, and run a border test to verify the path. Start the laser cutting process and monitor for accuracy.
How to Choose the Right Method?
| Factor | Manual Cutting | CNC Router | Laser Cutting | Waterjet Cutting |
|---|---|---|---|---|
| Cost | Low ($10-$50) | High ($500+) | Very High (Industrial) | Very High (Industrial) |
| Precision | Low | High | Very High | High |
| Ideal Board Thickness | Thin (<1.6mm) | Thick (1-5mm) | Any | Thick (3+mm) |
| Complexity of Cuts | Straight lines only | Complex shapes | Intricate designs | Any shape |
| Safety Risks | Low (if careful) | Low (enclosed) | High (fumes) | Low (dust control) |
FAQ
Q: Can I cut a PCB with a hacksaw?
A: Yes, but use a fine-toothed blade and clamp the board securely. Expect more manual effort and potential rough edges.
Q: Is laser cutting safe for home use?
A: Only with industrial-grade lasers designed for PCBs. Hobby lasers pose fire and fume risks; avoid them for fiberglass boards.
Q: How do I prevent PCB cracking during cutting?
A: Use proper clamping, avoid rushing, and choose a tool suited for the board’s thickness. For thick boards, score multiple times before snapping.
Q: What’s the best way to dispose of PCB scraps?
A: PCBs contain hazardous materials. Recycle them through e-waste programs or specialized facilities.